Support
User guide
Everything in FileFlow, step by step: filing, documents, your team, printing and your account.
Download the guide (PDF)A4 · to print or read offline
Contents
Getting started
FileFlow is a filing system for your organization's paper and digital files. This chapter covers creating an account, signing in, what to do if you forget your password or lose your second step, and what you see the first time you open the app.
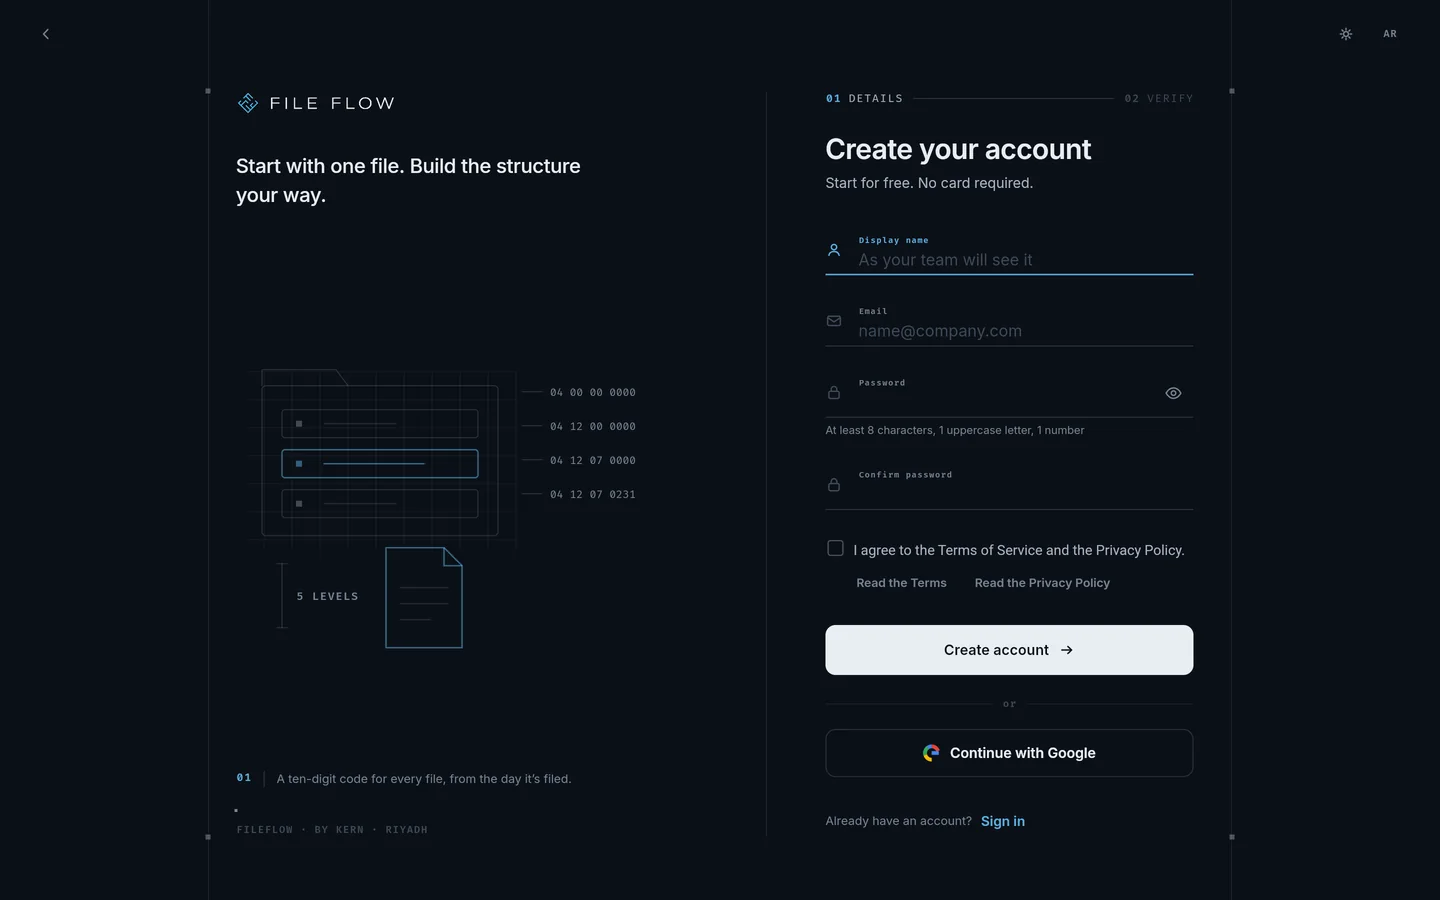
How FileFlow organizes your archive
Your archive has five levels, each inside the one before it: Project, Subject, Sub-Subject, 2nd Sub-Subject and File. Documents live inside each file: scanned pages, photos and PDFs. Every level has a two-digit number, and those numbers make up the file's 10-digit code, such as 01-0102-0301. Print the code on a sticker, put it on the paper folder, and you can reach the digital copy by scanning or searching. The chapter The archive structure has the details.
Create an account
Open Create your account. You start for free, and no card is required.
- Enter your Display name as your team will see it: 2 to 50 characters, starting with a letter. Letters in any language, spaces, hyphens, apostrophes and dots are allowed.
- Enter your Email. If the domain looks mistyped, such as gmial.com, FileFlow suggests the right one with a Use this link. It never changes the address for you.
- Choose a Password: 8 to 72 characters, with an uppercase letter and a number, no space at the start or end, not containing your name or email, and not a common password. A strength meter under the field reads Weak, Fair, Good or Strong.
- Type it again in Confirm password.
- Tick I agree to the Terms of Service and Privacy Policy. You can read them first with Read the Terms and Read the Privacy Policy.
- Select Create account.
If you select the button before agreeing, you see "Accept the Terms of Service and Privacy Policy to continue." Each field shows what needs fixing underneath it, such as "Passwords do not match".
Next comes the VERIFY step. A 6-digit code arrives by email. Type or paste it into 6-digit code; FileFlow checks it as soon as the sixth digit is in. Arabic digits work too. After 60 seconds a Resend code link appears. If you typed the wrong email, select Go back. If the code doesn't arrive, check your spam folder.
- A wrong code clears the field and shows "Invalid code. Please check and try again."
- An expired code shows "Code has expired. Please request a new one."
- Asking too often shows "Too many attempts. Please wait a few minutes and try again."
If the email already has an account, FileFlow sends no code. It emails the address's owner sign-in help instead, which is why the code page says "Already have an account with this email? We've sent sign-in help to it instead of a code." A new account stays signed in on this browser.
Signing up with Google. Tick the terms box first, then select Continue with Google and choose your account. If you see "Pop-up blocked. Allow pop-ups for this site and try again.", allow pop-ups for FileFlow and try again.
The terms page. If your account has no record of agreeing to the terms, a Terms and privacy page appears after you sign in. Tick I have read and agree to the Terms of Service and Privacy Policy. and select Continue, or choose Sign out. You cannot reach your files until you agree.
During maintenance, new accounts are paused and you see "Account creation is paused during maintenance. Try again shortly."
Join an organization by invitation
If an Admin of an organization invites you and you have no account, you get an email with a button to create one. The sign-up page opens with a line such as "Ahmed invited you to Al Noor Co. Create your account to join." The email is filled in and locked, because the invitation belongs to that address. Finish signing up as usual. The first time you sign in, you are a member of the organization and it appears in your list of workspaces.
This kind of invitation is valid for 7 days. Once it expires, FileFlow tells you so and names who invited you: you can still create your account, then ask them to invite you again.
If you already have an account, you don't need to sign up. Sign in, and the invitation waits in the workspace list under PENDING INVITATIONS, where you choose Accept or Decline. See the chapter Home and finding your way.
Some email links open Welcome to FileFlow, where you choose a password for your account. If another account is signed in on the same browser, select Sign out and continue. A link works once and for a limited time. If you see "This link no longer works", select Email me a code and set your password with the code.
Sign in
On Welcome back, enter your email and password and select Sign in, or select Continue with Google. FileFlow remembers the last email used on this device.
Keep me signed in. It is ticked by default. If you untick it, you stay signed in while the browser is open, and FileFlow asks you to sign in again after you close and reopen the browser. Your choice is remembered for next time.
Wrong password. After the first wrong try you see "Email or password is incorrect." with the number of attempts left. The third wrong try pauses sign-in for 1 minute, the fourth for 3 minutes, the fifth for 5 minutes, and every wrong try after that for 10 minutes. Waiting doesn't reset the count; only a successful sign-in does. While paused, a Too many attempts notice counts down, and you can select Forgot password? instead of waiting.
Unverified email. If you never finished the code step when you signed up, FileFlow sends a new code when you try to sign in and shows "This email hasn’t been verified yet. We sent a new code."
If you open a FileFlow link while signed out, you land back on that page after signing in. During maintenance the sign-in page shows "FileFlow is under maintenance".
If you arrive from another KERN app, such as Aqarly, that wants to connect to your account, an Approve connection notice appears. Sign in, then choose the workspace you want to share. See the chapter Security and your account.
Two-step verification at sign-in
If you turned on two-step verification, FileFlow asks for a second step after your password:
- Email code: Enter the code from your email opens and a 6-digit code arrives. After 5 wrong codes, entry pauses for 15 minutes.
- Authenticator app: Enter your authenticator code opens. Open the app and enter the code for FileFlow. Each wrong code shows "Incorrect code." and the attempts left; after 5 wrong codes you see "Too many attempts. Try again in 15 minutes."
- Both: Choose how to verify opens, where you pick Authenticator app (marked RECOMMENDED) or Email code. The authenticator page also offers Use an email code instead.
Tick Trust this device for 30 days if you don't want to be asked for a code on this browser for 30 days. You can revoke trust in Settings.
Every second-step page has Cancel and sign out, and Lost access? Use your backup key. An account that signs in with Google is asked for a second step only if it has an authenticator app linked. Setting up two-step verification is covered in the chapter Security and your account.
Forgot your password or lost your second step
To reset your password:
- On the sign-in page, select Forgot password?.
- Enter your email and select Send code.
- Enter the 6-digit code you received. If your account has an authenticator app linked, you are asked for its code too.
- Enter New password and Confirm new password, following the same rules as sign-up, and select Set new password.
You see Password updated and you are signed in. Select Continue to my files.
Backup key. If you lose your authenticator app or can't get into your account, use the backup key you saved from Settings. It starts with FF- followed by 8 groups of 4 characters (32 characters). Letter case, spaces and dashes don't matter.
- On the sign-in page select Can’t access your account?, or select Lost access? Use your backup key on a second-step page.
- On Recover your account, enter your email, your Backup key, and a new password twice.
- Select Recover account.
- When you see Account recovered, sign in with the new password, then save a new backup key from Settings.
Messages you may see:
- "The email or backup key is incorrect."
- "Too many attempts. Wait a minute and try again.", with a 60-second countdown on the button.
- "Account recovery is locked after too many attempts. Contact support."
- "This account is suspended. Contact support."
If you have no backup key and have lost your second step, email support@kern.sa from the address you sign in with.
The first time you open FileFlow
Welcome slides. After your first sign-in, a set of slides introduces the app: the five levels, the 10-digit file code, the home screen, the main features, team workspaces and account security. Move on with Next, leave with Skip, and finish with Get Started.
- The team workspaces slide has a Create Organization button. If your plan doesn't include organizations, it shows a lock and a BUSINESS tag and opens the plans page. You can create an organization later from the workspace list.
- The Secure Your Account slide (email and password accounts only) has an Enable Two-Factor Auth button. Selecting it doesn't turn anything on yet. When the slides end, Settings opens so you can choose a method and finish setting it up.
After the slides, if your account has neither two-step verification nor a backup key, a Secure your account window appears once. It offers a backup recovery key, an authenticator app and an email code. Choose Set up now or Later.
Home screen guides. During your account's first 30 days, short guides on the home screen point out the workspace switcher, notifications, search and Settings (on a phone, the more menu stands in for search and Settings). Use Next and Back, select Skip, or select Don't show guides to turn off the guides on every screen.
To see the slides again, open Settings and select Replay Welcome Tour.
Home and finding your way
Home is the first thing you see after signing in. From here you switch workspaces, reach your projects and what you opened last, and see reminders, activity and anything that needs you. This chapter walks through home and the ways to get around FileFlow.
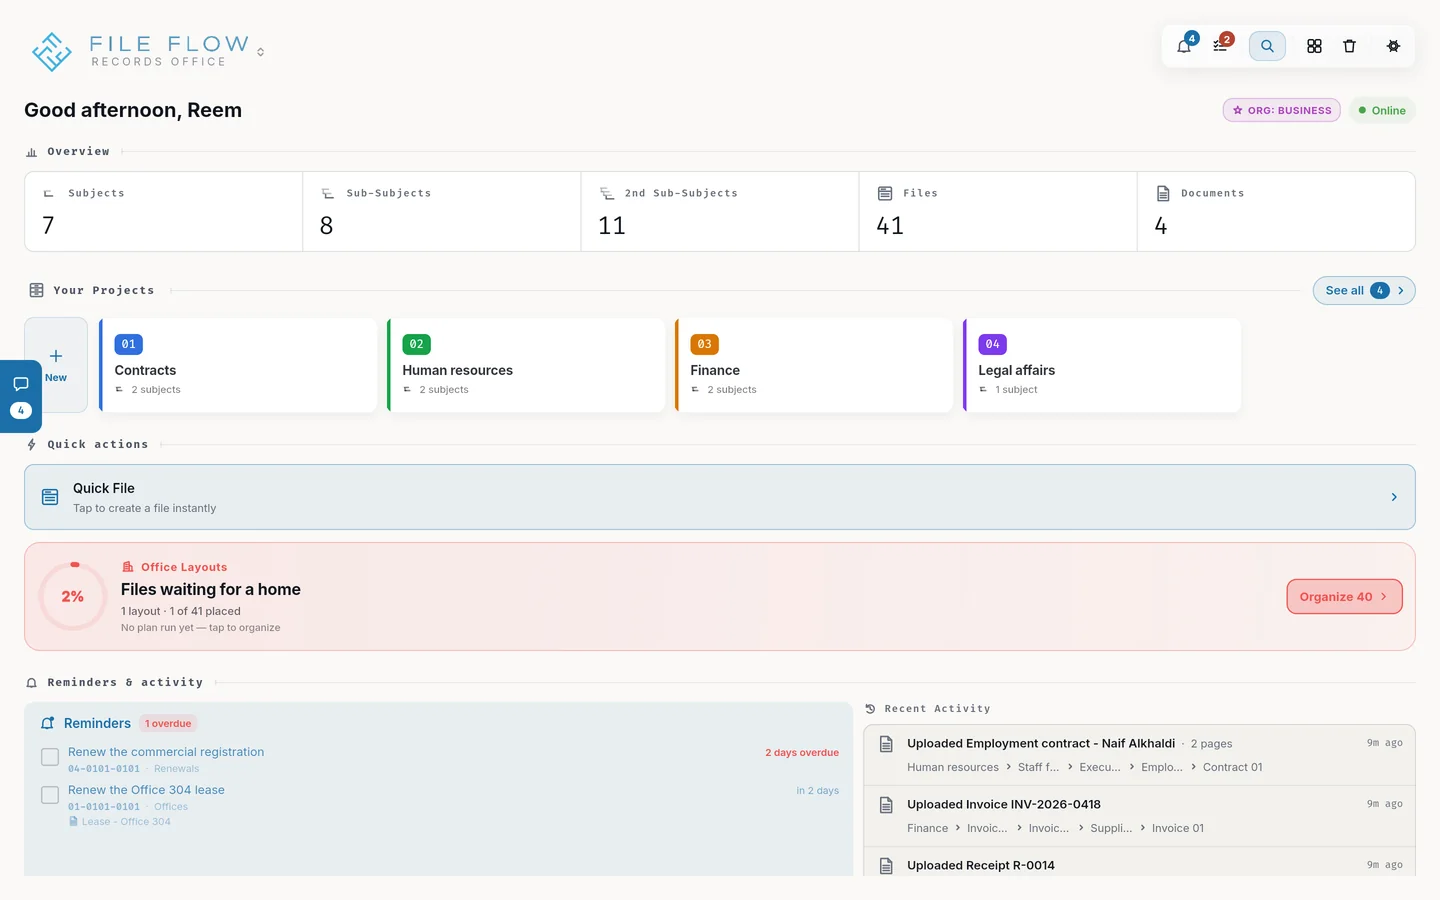
The home header
At the start of the header is the current workspace's name or logo; select it to open the workspace list. At the other end is a row of buttons:
- The bell: Notifications.
- Action Items: things waiting for you, with a count.
- Search: opens the Search page. See the chapter Text recognition and search.
- Home layout: choose how home looks.
- Trash: shown only to people who can open the trash.
- Settings.
On a phone (narrower than 768 px), the bell and Action Items stay in view and the rest move into the more menu: Quick Search, Home layout, Trash and Settings. Here Quick Search opens the quick search window described below, not the Search page.
Workspaces and switching between them
Every account has a Personal Workspace, your private filing system. Each organization you create or join has a separate workspace with its own projects and files. What you see on home, in search and in notifications belongs to the workspace that is open.
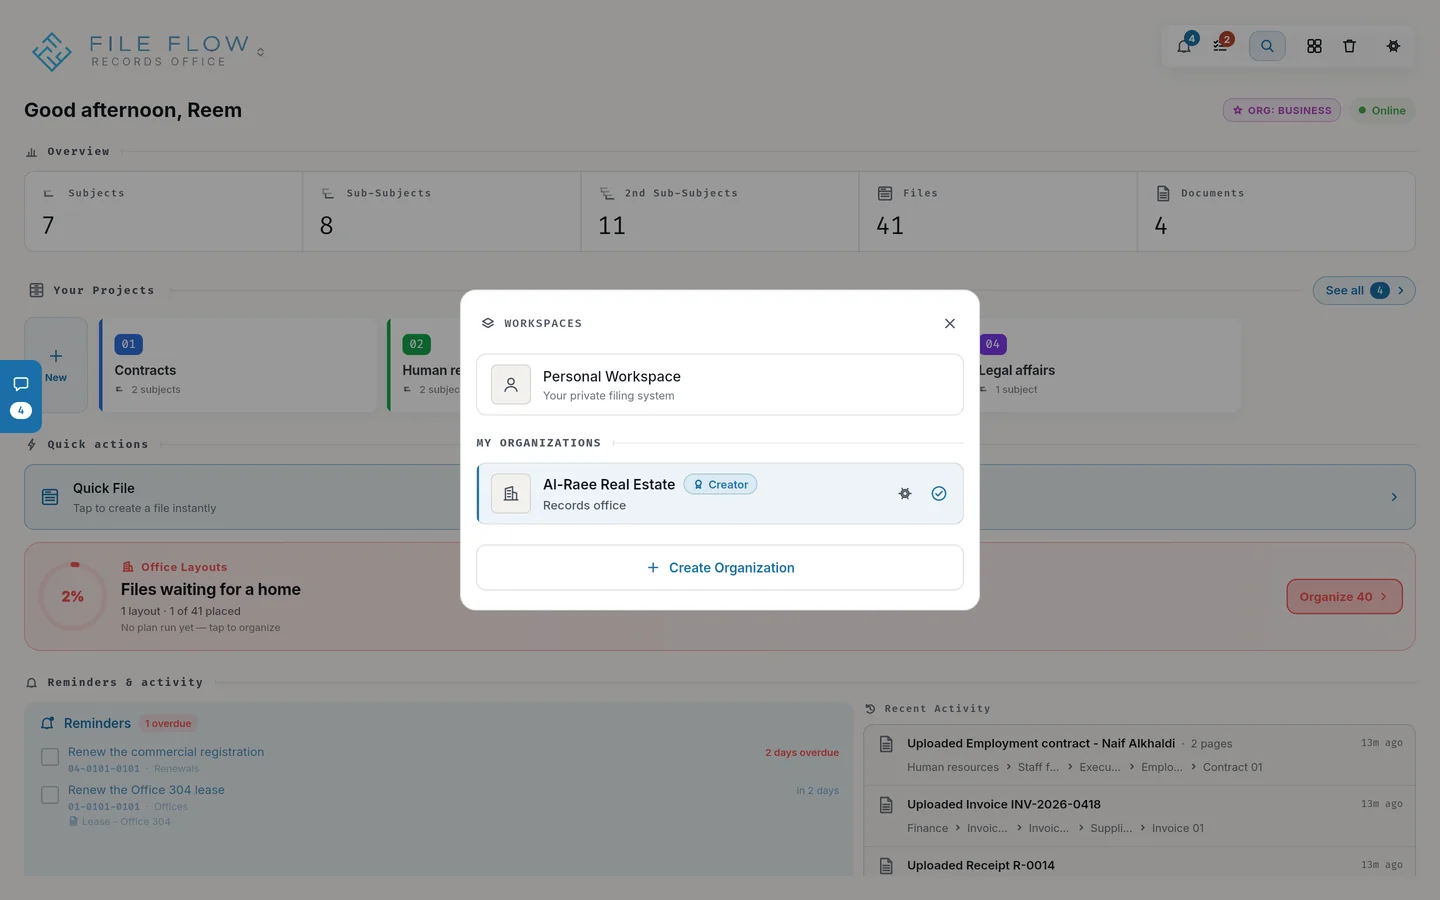
Select the workspace name in the header to open WORKSPACES. On a phone it slides up from the bottom; on larger screens it opens as a window. It lists:
- Personal Workspace.
- MY ORGANIZATIONS: organizations you created.
- JOINED ORGANIZATIONS.
- PENDING INVITATIONS: each with Accept and Decline. Once you accept, the organization joins the list.
- A Create Organization button. If your plan doesn't include organizations, it opens the plans page.
Select any workspace to move into it, and home reloads with its content. If an organization reads "Locked — over plan limit" (one you created) or "Locked — contact org owner to upgrade" (one you joined), its creator's plan no longer covers it, and it stays closed until they upgrade or buy an add-on. See the chapter Organizations, members and roles.
The two home layouts: Standard and Focus
Select Home layout and pick one. Your choice applies at once, with no Save button, and is saved to your account so it follows you across devices. The same choice is in Settings under Appearance. If you never chose, a Viewer in an organization starts on Focus and everyone else starts on Standard.
Standard. The full dashboard, top to bottom:
- A greeting with your name, your plan badge (in an organization, the organization's plan) and your connection status: Online, Slow or Offline. Selecting the plan badge opens billing for the plan's owner.
- Banners and notices (see below).
- Overview: counts of files, documents and each subject level; each count opens its list. In an empty workspace you see Welcome to FileFlow instead, inviting you to create your first project.
- Your Projects, with See all.
- Recently Viewed: the files you opened last.
- Quick actions: a Quick File card to create a file at once, for people who can create. On narrow screens, or for Viewers, a Search card.
- A card for your office layout. See the chapter Office layouts and locations.
- Reminders & activity: reminders that are due, and Recent Activity.
- At the bottom: a tip you can dismiss, then Shared with me and Shared by me in your personal workspace, or My Tasks and Org Tasks in an organization, and Analytics in both.
Focus. A simpler home: a large greeting with today's date or your reminder count, then banners, then a Search bar that opens quick search, then a strip of overdue and upcoming reminders when there are any, then what you viewed recently, Quick actions, Library (projects, files and documents) and Explore. In your personal workspace, Explore holds Shared with me, Shared by me and Analytics with a storage bar; in an organization, My Tasks, Org Tasks and Analytics.
Recent Activity. Shows the workspace's last 8 events from the past 7 days: a document uploaded, a file created or a reminder completed, each with its full path. Select an event to open the item. With nothing to show you see "No activity this week". Events about items hidden from you are left out.
On a phone, pull home down to refresh it.
Banners and notices
Depending on your situation, messages appear at the top of home or of every page:
- No connection with "Browse mode only — editing is paused" and Retry: you can browse, and editing waits until you are back online.
- A new version is available with a Refresh button to load the latest version.
- Install FileFlow to add the app to your device. In Chrome and Edge select Install; in Safari select How? for the steps.
- A scheduled maintenance notice, a day or less before the window, so you can save your work.
- View only, if you are a Viewer in an organization: you can view only, and an Admin can give you edit rights.
- Your account isn't fully secured, if your account has neither two-step verification nor a recovery key. Set up opens Settings; if you dismiss it, it returns after 7 days.
- Announcements from the FileFlow team, one at a time, with Dismiss.
- Plan, payment and storage notices that lead to billing. See the chapter Plans and billing.
Quick search
The quick search window is the fastest way to anything. Open it with Ctrl+K on the keyboard from home, from the Search bar in Focus, or from Quick Search in the phone's more menu.
- Before you type, it offers commands: Quick File, Full Search (opens the Search page), Dashboard (opens Analytics) and Settings.
- As you type, it shows the first 8 matching projects, subjects, files and documents in the current workspace. A document opens the file that holds it.
- On a computer, move through results with the arrow keys and open one with Enter. Ctrl+K closes the window.
- With no match you see "No results found".
Notifications and Action Items
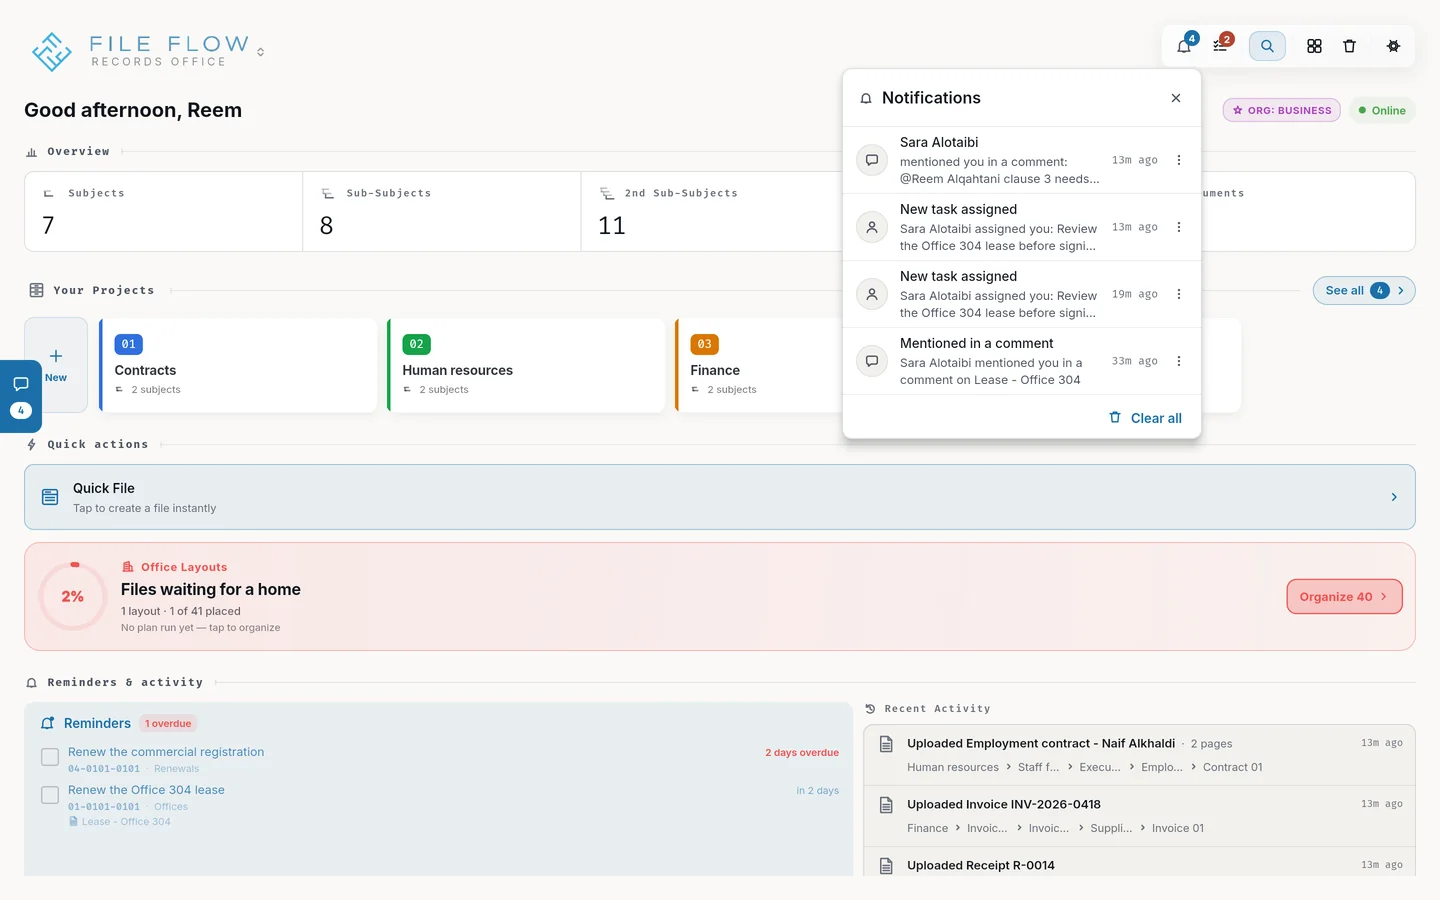
Notifications. Select the bell to see them: a drop-down on a computer, a sheet from the bottom on a phone. The number on the bell is how many notifications you have. A notification arrives, with a sound, when:
- someone asks to connect with you or accepts your request (Connection Request, Connection Accepted);
- someone shares an item with you (Item Shared);
- you are invited to an organization (Organization Invitation), a new member joins, someone declines an invitation, your role changes, or an organization you were in is deleted;
- someone mentions you in team chat or a comment, assigns you a task, or changes a task's status.
Select a notification to open what it points to; it then disappears. If the item is no longer there, you see "This is no longer available. It was deleted, or you no longer have access to it." and the notification stays. Swipe a notification aside to remove it, or select Clear all to clear the current workspace's notifications.
Notifications belong to a workspace. Your personal workspace shows its own plus organization invitations; an organization shows only its own. FileFlow deletes notifications older than 24 hours, so open what matters to you the same day. With nothing new you see "All caught up!".
Action Items. The button beside the bell gathers what needs you, grouped under NEEDS ATTENTION, WARNINGS and INFO. Each item leads you to the fix:
- Pages whose text could not be read: opens a window with Retry All.
- Pages skipped because you reached the monthly text-recognition limit.
- Reminders overdue or due within 3 days: takes you to the reminders on home.
- Overdue tasks (organizations): opens Org Tasks.
- Changes that failed to save in a sync error: retries them.
- Billing alerts: storage over the limit with the days left, storage above 85%, text recognition or shares above 80% of the monthly limit, or a card about to expire. These lead to billing and are not shown to organization members other than its creator.
With nothing to do you see All clear!. On a phone the list slides up from the bottom; on a computer it opens as a window.
Help and support
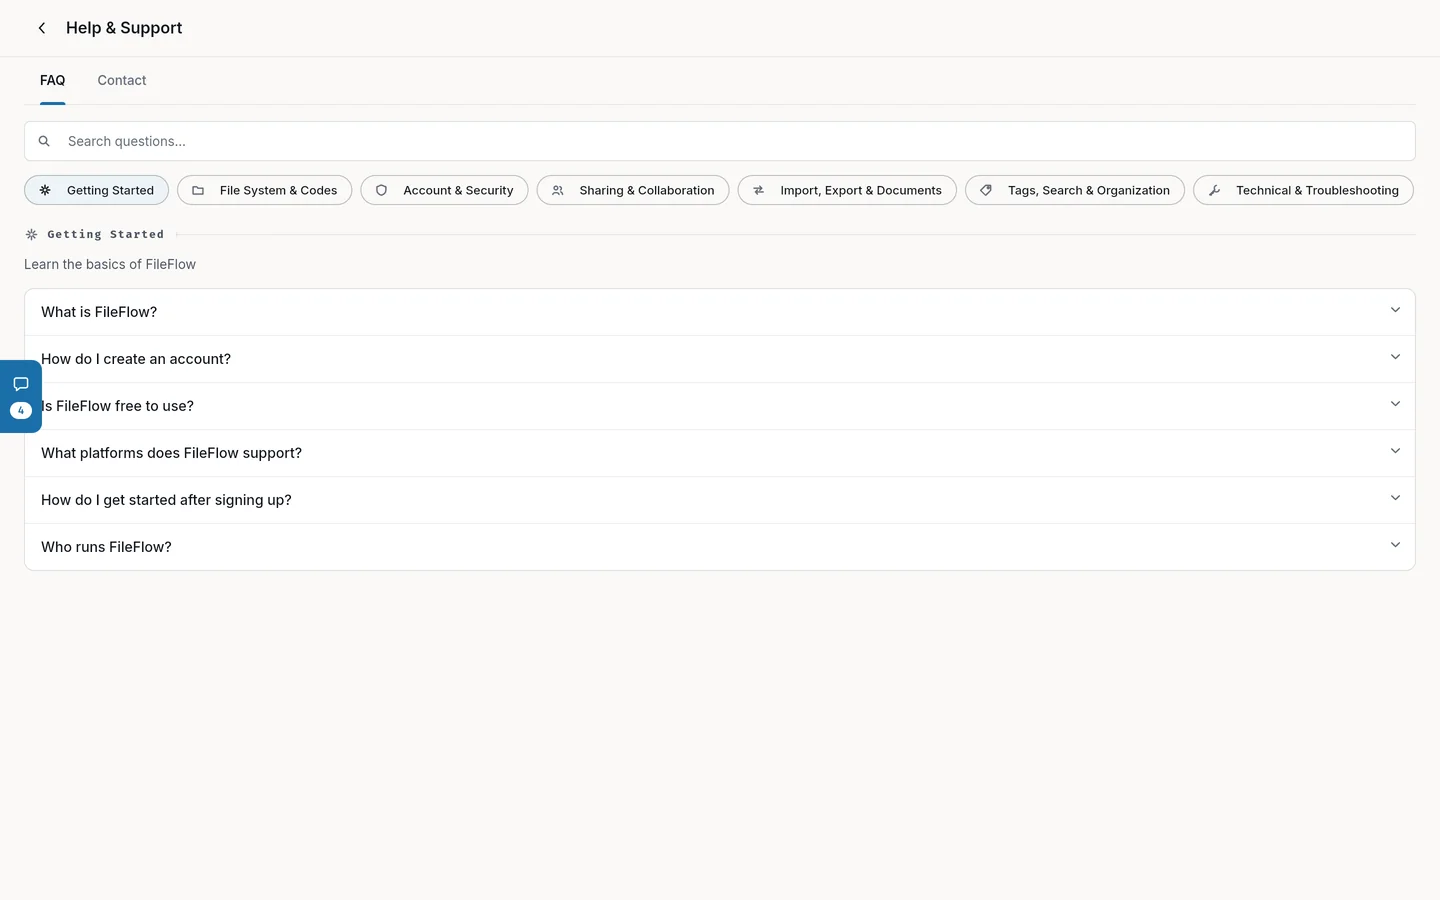
Open Settings, then Help & Support. The page has two tabs:
- FAQ: search the questions in the search box, or browse them by category.
- Contact: Email Support opens an email to support@kern.sa. We typically respond within 24 hours on business days.
In your message, include the email you sign in with and what you were doing when the problem happened. The Help page needs you to be signed in; the FAQ is also open to everyone at fileflow.sa/faq.
The archive structure
FileFlow arranges your archive in five fixed levels, the way you would arrange a filing cabinet. That arrangement gives every file a 10-digit code that tells you where it sits, both in the digital archive and on the office shelf.
The five levels
- Project: the top level, like a cabinet. It might be a client, a branch or a department.
- Subject: inside a project, like a drawer.
- Sub-Subject: inside a subject, like a folder in the drawer.
- 2nd Sub-Subject: inside a sub-subject, like a sub-folder. This is where you create files.
- File: holds the documents themselves. See the chapters Files and Documents and scanning.
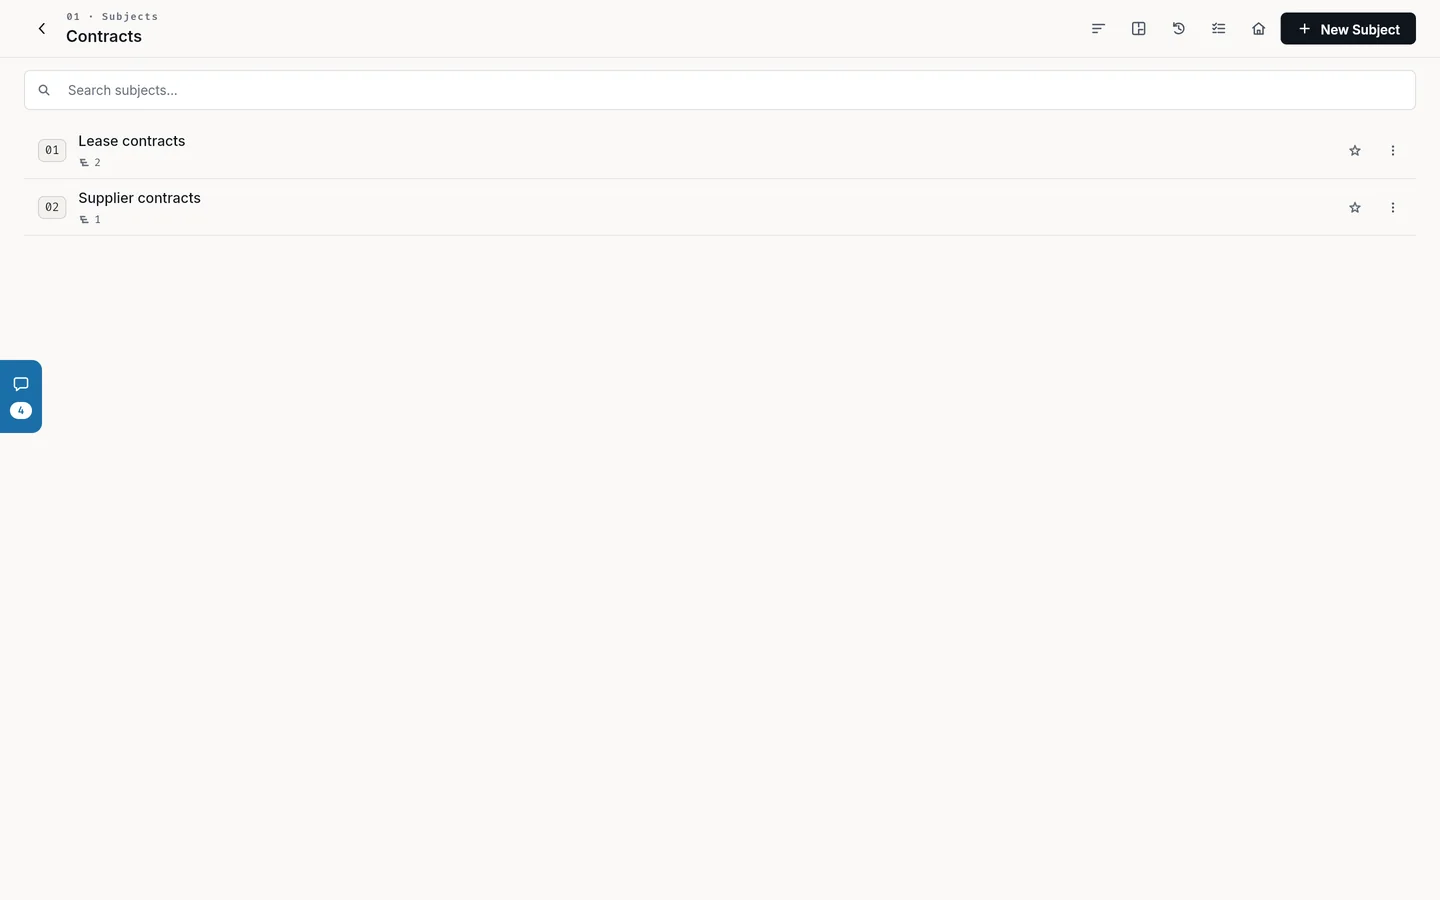
Each level has its own page: Projects, then Subjects, Sub-Subjects, 2nd Sub-Subjects and Files. Tap any row to open what is inside it. Above each list FileFlow shows the part of the code built so far, such as 01-0102, so you always know where you are. You can also open one list of every item at a level from the figures on the Home screen, such as All Subjects and All Files.
Each list has a search field that matches names and numbers, and a Sort button with Number 1-9 (the usual order), Number 9-1, Favorites and By Tag. A dot on the button means you chose an order other than the usual one. FileFlow remembers your choice for each list.
Numbers and the file code
Every item at every level has a two-digit number from 00 to 99, and no two items under the same parent share a number. So each parent holds at most 100 items at the next level, whatever your plan.
When you create an item, FileFlow suggests the lowest free number. You can type another. If it is taken, the field shows "Number already in use". If all 100 slots are full, you see "All 100 slots are used. Delete an existing item to free a slot."
When you create a Subject, Sub-Subject or 2nd Sub-Subject, an expandable list called Used in other projects (or Used in other subjects, or Used in other sub-subjects) shows the numbers and names you have used under other parents. Choosing one fills in both the number and the name. That way the same subject carries the same number in every project, and codes stay alike and easy to remember.
The file code. A file's code is made of the numbers of all five levels, in the form PP-SSBB-DDFF: the project number, then the subject and sub-subject numbers, then the 2nd sub-subject and file numbers. For example, 01-0102-0301 means Project 01, Subject 01, Sub-Subject 02, 2nd Sub-Subject 03, File 01. The code always reads left to right. It appears in the files list, at the top of the file viewer, in the QR code window and on printed stickers.
The code is not saved on its own. FileFlow builds it from the numbers each time. So if you change the number of any level, or move it and it takes a new number, the codes of every file beneath it change. If you have printed stickers for those files, print them again after the change.
Creating a level
To create a project, subject, sub-subject or 2nd sub-subject:
- Open the parent level, or the Projects page for a new project.
- Select New Project, New Subject, New Sub-Subject or New 2nd Sub-Subject at the top of the page. On a phone (narrower than 768 px), it is the round + button at the bottom of the screen.
- Check Number (2 digits) and type a name (up to 60 characters). A project also has Color, shown as a dot beside its name.
- Select Create. A message such as "Subject created" confirms it.
A name is required; an item without one is not saved. You cannot create or edit while offline or while an import is running. In the second case you see "Import in progress — editing is disabled".
Editing and moving
Editing. Choose Edit from the row menu to change the number and name, and a project's color. A taken number is refused with the same "Number already in use". Remember that a new number changes the codes of the files beneath.
Moving one item. Choose Move from the row menu. A window called "Move (name) to…" opens with a Search destinations… field, and the current place is shown greyed out as Current location. Pick the destination and select Move here. This window only offers nearby destinations:
- A subject: any project in the workspace.
- A sub-subject: another subject in the same project.
- A 2nd sub-subject: another sub-subject in the same subject.
Moving anywhere. To move an item further, select it first (see Selecting several items below), then select Move in the bottom bar. The Move to... window walks you through the whole workspace step by step, with "Step 1 of 3", for example, at the top: Select Project, then Select Subject, and so on down to the level you need.
Projects cannot be moved. A move always stays inside one workspace, so you cannot move from your personal workspace into an organization or the other way round.
What happens to numbers. An item keeps its number if it is free at the destination. If it is taken, the item takes the lowest free number and its code changes, and FileFlow tells you: "Moved. One item took a new number because its own was taken there, so its code changed." Otherwise you see "Moved successfully". If the item is already there, you see "Already there. Nothing needed moving."
If a move fails, you see "Move failed:" followed by the reason, for example:
- "That destination is full: all 100 numbers are in use. Choose another, or make room first."
- "That destination no longer exists. It may have been deleted. Refresh and choose again."
- A refusal because your organization role does not allow moving, or because your plan's limit at the destination is full.
If a connected app such as Aqarly files documents into the item you are moving, FileFlow tells you what will change after you pick the destination, and you can choose Move it or Leave it alone. See the chapter Security and your account.
Selecting several items
To work on several items at once, select Select all at the top of the list, or press and hold any row. The header shows the count, such as "3 selected", with Select all and Clear selection. The bottom bar has:
- Tag: add tags to every selected item.
- Move: move them step by step anywhere in the workspace (not for projects).
- Move to Trash: move the selected items and everything inside them to the Trash.
Viewers do not get the select button, and you only see the buttons your role allows.
Moving to the Trash
Choose Move to Trash from the row menu. A window asks "Move to Trash?" and explains that the item and all its contents will go to the Trash. Select Move to Trash to confirm.
Every level, file and document beneath the item goes with it, and you can restore them later from the Trash. The reminders, cross-references and physical locations of the files inside, however, are deleted for good and do not come back when you restore. See the chapter Trash.
If you try to add something to an item that is now in the Trash (moved there from another device, for example), you see "The file or folder you're adding to is in the Trash. Restore it first, then try again."
Who can do what
- In your personal workspace you are the owner, and every action is open to you.
- Admin: creates, edits, moves, tags and moves to the Trash.
- Editor: creates, edits, moves and tags, but cannot move anything to the Trash.
- Viewer: opens, reads and adds to Favorites only.
- The organization's creator also sees Access Control, to hide items from certain members. See the chapter Organizations, members and roles.
Share appears in the row menu in your personal workspace only (see the chapter Connections and sharing). Export appears in a project's menu and is a Business plan feature (see the chapter Import, export and analytics). Timeline opens the project's timeline (see the chapter Files).
Plan limits
The structure limits on each plan:
- Projects: Free 2, Pro 25, Business unlimited.
- Subjects per project: Free 5, Pro 25, Business unlimited.
- Sub-subjects per subject: Free 5, Pro 20, Business unlimited.
- 2nd sub-subjects per sub-subject: Free 5, Pro 20, Business unlimited.
The 100-items-per-parent limit applies on every plan, because it comes from the numbering. Items in the Trash do not count, but restoring from the Trash and moving into a new parent count as adding.
When you reach a limit, a window opens with a title such as "You've reached your Subjects per Project limit". It shows how much of the limit you have used, compares the plans, and offers an upgrade button and Maybe Later. See the chapter Plans and billing.
In an organization, the limits of the organization creator's plan apply to every member. If you reach a limit as a member, ask the organization's creator to upgrade.
The Quick Files project
The first time you use Quick File, FileFlow creates a special project called Quick Files, with Unfiled, then General, then batches such as Batch 01 inside it. It takes the first free project number and always sits at the end of the Projects list. It is an inbox: you file things quickly and sort them later (see the chapter Files).
The Quick Files project is part of FileFlow. You cannot edit, select, move or trash it, and you cannot create subjects or files inside it by hand. You can move files out of it into your archive. If you try to move anything other than files into it, you see "Quick Files keeps its own structure. Only files can be moved into it."
If all 100 project numbers are in use, it cannot be created and you see "All 100 project numbers are in use, so Quick Files could not be set up."
Files
A file in FileFlow is the digital copy of a paper file on your shelf. You keep its documents in it, add details, tags and reminders, and print its code on a sticker that links the paper to the digital copy.
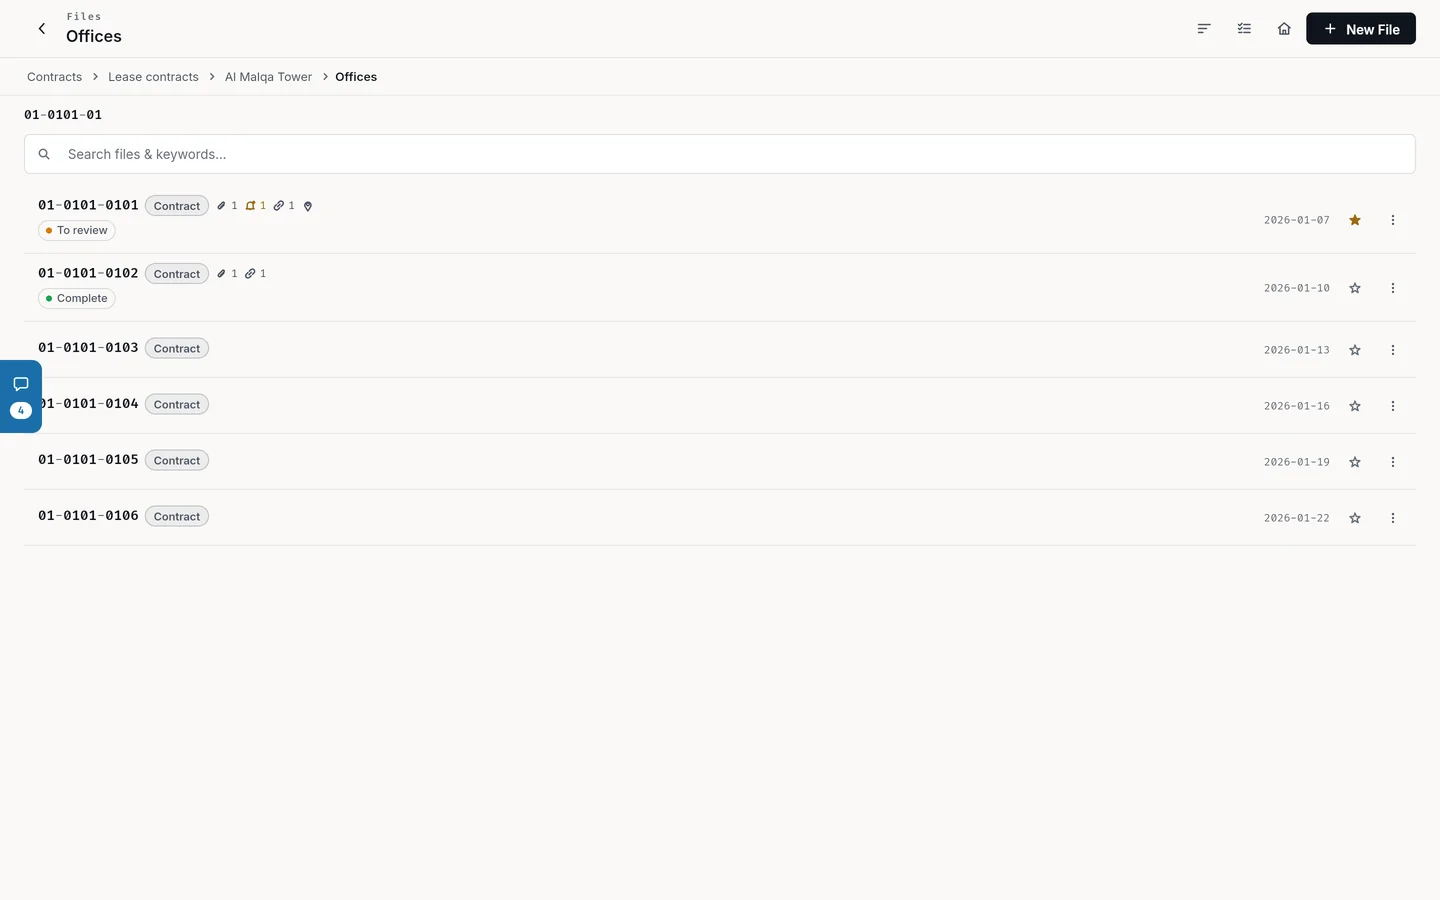
A file has no name. A file is known by its two-digit number inside its 2nd Sub-Subject, its full 10-digit code (see the chapter The archive structure), its type and its details. Details are free-text lines where you write, for example, the owner's name or a contract number. The first two show under the file number in the list.
The files list
Open any 2nd Sub-Subject to see its files. The page title is the 2nd Sub-Subject's name. Under it are the path of levels and the start of the code that every file on this page shares.
Each row shows the file code, the date it was created, its type, the number of Documents, Active Reminders and Cross-References, a pin when it has a Physical Location, the first two details (the rest are behind "more details..."), its tags and a favorite star. Tap a row to open the file.
The Search files & keywords... field matches the file's number, code, type and details, and the keywords of its documents. The Sort button has one extra option here: By Type.
The row menu (from the row's button, a right-click or a long press):
- QR Code: everyone.
- Set Location or Physical Location: when the workspace has an office layout and your plan includes it. See the chapter Office layouts and locations.
- Tags, Move and Edit: Admins, Editors and your personal workspace.
- Access Control: the organization's creator only.
- Share: your personal workspace only. See the chapter Connections and sharing.
- Move to Trash: Admins and your personal workspace.
The All Files page lists every file in the workspace with the same menu and the same permissions.
Creating a file
- Open the 2nd Sub-Subject and select New File at the top of the page. On a phone (narrower than 768 px), it is the round + button at the bottom of the screen.
- In the Create window, choose Single File.
- Check Number (2 digits). Under it, File Code: updates with every digit you type.
- Choose a Type.
- Type details in Detail 1. To add another line select Add detail; to delete a line select Remove. Empty lines are not saved.
- Select Create. You see "File created".
If the number is taken, the field shows "Number already in use". If all 100 numbers are used, you see "All 100 slots are used. Delete an existing item to free a slot." If saving is refused for another reason, you see "Failed to save:" followed by the reason.
If the workspace has no file types yet, Admins, the organization's creator and personal-workspace owners see "Create a file type first" with Create a file type and Not now. Editors see a message asking them to ask an Admin to create one.
You cannot create files by hand inside the Quick Files project, while offline, or while an import is running.
You can also create from the All Files page. There you pick the Project, Subject, Sub-Subject and 2nd Sub-Subject from lists, then the type, the number and one optional detail.
Editing a file. Choose Edit from the row menu. In Edit File you change the number, type and details, then select Save. If the sub-subject holds more than one 2nd Sub-Subject, a 2nd Sub-Subject field appears; changing it moves the file. If its number is taken there, it takes the first free number and its code changes.
Quick File
Quick File creates a file in a few seconds without choosing its place first.
- Select the Quick File card in the Quick actions section of the Home screen, or choose Quick File in the command palette (Ctrl+K).
- Choose a File Type. To add one detail, select Add detail and type it in Detail (optional).
- Choose File to Inbox to sort it later, or Pick location... to choose the 2nd Sub-Subject step by step.
- You see "File created" with its code, and Open to go straight to the file.
The inbox is the Quick Files project (see the chapter The archive structure). Its batches fill in order, and when one is full FileFlow starts the next. Pick location... is greyed out with "No projects yet" until you create a project. If the workspace has no file types, the first use creates the two types Hanging and Box.
To sort a file out of the inbox, select it in the batch list, select Move in the bottom bar and pick its place step by step. (Move in the row menu only offers the other batches.)
Viewers do not see the Quick File card. Your plan's file limits apply to quick files like any other.
Creating many files at once
To create dozens of files in one go, select New File, then Multiple Files. This option is for Admins, the organization's creator and personal-workspace owners; Editors see it greyed out.
- On the Bulk Create Files page, choose Enter Names and type one line per file, or Upload File and then Pick Text File to upload a .txt or .csv file with one line per file.
- Choose File Type (for all files).
- Fill in Prefix or Suffix if you want text added before or after every line.
- Select Continue to Preview, check the files and their code range, and untick any line you do not want.
- Select Create with the number of files. When it finishes you see how many files were created, and a View Files button.
Each line becomes the first detail of a new file, and each file takes the next free number automatically. Empty and duplicate lines are dropped. A .csv file is read line by line; lines are not split at commas.
The limit is 100 lines per run. If the free numbers or your plan's limits do not cover every line, the preview says, for example, "20 of 30 files can be created (10 excluded)", and only the allowed files are created.
File types
Every file has a type, which sets the size of its printed sticker. Every workspace has two ready-made types, Hanging and Box, and Hanging is chosen by default when it exists.
To manage types, open Settings, then Organize, then Manage File Types (personal-workspace owners, Admins and the organization's creator), or select Manage file types beside the type field in the file window. On the File Types page:
- Select New File Type.
- Type a Type Name (up to 40 characters), choose a Unit, then the width and height.
- Save. You see "File type created", and the sticker designer opens. See the chapter Printing and QR codes.
A name that already exists is refused. A type that is in use cannot be deleted; you see a message such as "Cannot delete "Archive box" — used by 4 file(s)". The ready-made types cannot be edited or deleted, and they have Reset to default design.
Custom file types on each plan: Free 0, Pro 1, Business 3.
Details, tags and favorites
Details. A file's details appear in the file viewer marked Encrypted, because they are stored with AES-256 encryption. FileFlow manages the encryption keys, so there is no extra password for you to remember. In an organization, every member who can open the file can read its details. You edit details from Edit in the row menu, not in the viewer. Details per file: Free 1, Pro and Business unlimited.
Tags. Choose Tags from the row menu, tap a tag to add or remove it, then select Done. Your choices save at once. To create, edit and delete tags, open Settings, then Manage Tags. The limit is the number of tags in the workspace, not the number on a file: Free 3, Pro 50, Business unlimited.
Favorites. Tap the star on any row. Favorites are yours alone, every role can use them, and they come first when you choose Favorites under Sort.
File limits on each plan
- Files in each 2nd Sub-Subject: Free 5, Pro 50, Business unlimited. The upgrade window calls this limit "Files per Category".
- Total files: Free 50, Pro 5,000, Business 50,000.
In an organization, the limits of the organization creator's plan apply. See the chapter Plans and billing.
The file viewer
A file opens in the viewer. Its title is the 2nd Sub-Subject's name, with the file code and "Documents" above it.
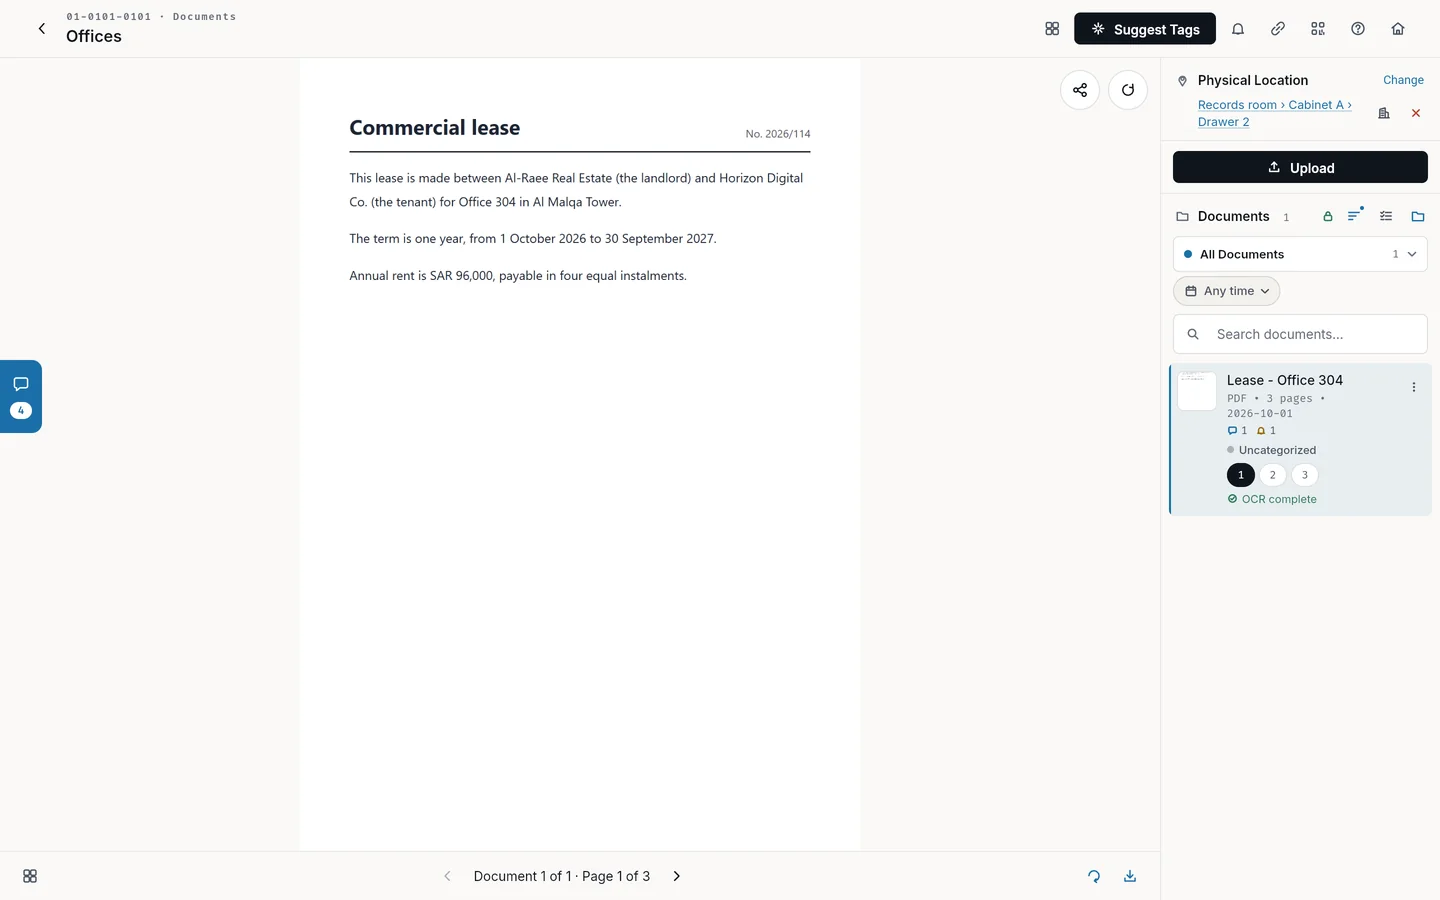
On a wide screen, the viewer shows the document on one side and a side panel on the other. The panel holds Physical Location, then Upload, the file's details and the list of documents, then one open section at a time from Reminders, Cross-References, Comments or Notes, each with a Close button.
On a phone the document fills the screen. Tap the small Documents button to open a bottom panel with the tabs Documents, Comments (organizations only), Reminders and Cross-References.
The buttons at the top of the viewer, in order:
- Switch to grid view or Switch to page view.
- Suggest Tags: when the documents have recognized text. See the chapter Text recognition and search.
- Reminders and Cross-References: open that section in the side panel on a wide screen.
- QR Code.
- Show tour.
- Home, together with Back.
On a phone most of these sit under More. The viewer has no way to move, edit or trash the file; those are in the row menu of the files list. Documents and their buttons are covered in the chapter Documents and scanning, and comments in the chapter Working with your team.
The file's QR code
Choose QR Code from the row menu or the viewer. A window titled "QR Code —" with the file code opens, showing the QR code and the file's link in FileFlow. Select Copy Link to copy the link; you see "Link copied to clipboard". To print the code on a sticker, see the chapter Printing and QR codes.
Cross-references
A cross-reference links a file to a related file, with a note that explains why. The link shows on both files.
- In the viewer, open Cross-References and select Add.
- In the Link File window, search in Search files. The search matches the file code (with or without dashes), the level names and the type name.
- Choose the file. In the "Link to" window, add a Note (optional) if you like, then select Link.
From each link's menu choose Edit note or Remove (it asks "Remove this cross-reference?"). Tap a link to open the other file; if you have no access to it, you see "This file is not shared with you". Links to files in the Trash are hidden. If adding fails, you see "Could not add the link:" followed by the reason.
Reminders
A reminder is a date attached to a file, or to one document in it, such as a contract renewal date.
- In the viewer, open Reminders and select Add. On a phone, open Documents, then the Reminders tab.
- In Add Reminder, pick the document under Select document, or leave it on General for the whole file.
- Type a Title (required), pick the date, then the Repeat setting.
- Select Save.
Each reminder shows its state: "Due today", the days left or overdue, or "Completed". Tick the box when you are done. Its menu has Edit and Delete.
Reminders appear inside FileFlow: in the Reminders card on the Home screen, and in Action Items for overdue reminders and those due within 3 days. In items you open from Shared with me, reminders and cross-references are read-only.
The project timeline
The timeline gathers a project's reminders, uploaded documents and created files in one record. Open it from Timeline in the project's menu or at the top of the project's page.
Events sit under Upcoming, then a Today marker, then Past. Under Filters you choose All, Reminders, Documents or Files, a Date range, and Newest first or Oldest first, and you can search with Search timeline….
To add a reminder from here, select Add reminder (the round button on a phone), then Select a file, then fill in the reminder fields. Viewers can read the timeline but not change it.
Moving or trashing a file
Moving. Move in the row menu offers the other 2nd Sub-Subjects inside the same sub-subject. To move the file anywhere else, select it, select Move in the bottom bar, and pick the project, subject, sub-subject and 2nd Sub-Subject. The file keeps its number if it is free; otherwise it takes a new one, its code changes and FileFlow tells you. Details are in the chapter The archive structure.
Trash. Choose Move to Trash (Admins and your personal workspace). The window asks "Move to Trash?" and explains that the file, its details and its documents will go to the Trash and that you can restore them later. The file's reminders, cross-references and physical location are deleted for good and do not come back when you restore. See the chapter Trash.
Documents and scanning
Documents are what a file holds: pictures, PDFs and pages you scan with a camera. Open a file and its documents appear in the document viewer, where you add, organize, download and share each one.
What a document is
Document. One item with one name, made of one page or many. A PDF becomes one document with all its pages, a camera scan of several pages becomes one document, and each picture you upload becomes its own document (five pictures picked together give five documents).
- A document holds up to 50 pages, on every plan.
- FileFlow does not keep the original PDF. It stores each page as an image, and when you download, it rebuilds a PDF from the pages in order.
- Your plan's Documents per File limit counts documents, not pages, so a 30-page PDF counts as one. Storage and OCR pages are counted per page.
Adding documents
The owner of a personal workspace can add documents, and in an organization so can Admins and Editors. Viewers do not see the add buttons. Accepted formats are JPG, JPEG, PNG, BMP and PDF, and you can pick several files at once. If nothing you picked is supported, you see "No supported files found. Use JPG, PNG, BMP, or PDF."
To upload pictures or PDFs:
- Open the file and select Upload at the top of the documents panel (or in the middle of the viewer when the file is empty). On a computer you can also drag files onto the viewer.
- Choose the files on your device.
- In Upload Quality, choose a quality and select Upload.
- In Rename Documents, edit each document's name (one field per document, up to 240 characters) and select Save, or select Skip to keep the original names.
- Wait for Upload Complete, which shows how many documents and pages were added and how much storage they use.
After the upload, the viewer opens on the first page of the last document you added, and text recognition starts on its own (see the chapter Text recognition and search).
The Upload Quality options (the default is High). Each option shows an estimated size and the OCR accuracy to expect:
- Original: keeps the image exactly as it is. Best OCR accuracy, largest size.
- High: light compression, longest side up to 3000 pixels.
- Medium: longest side up to 2000 pixels.
- Low: longest side up to 1200 pixels. Smallest size, reduced OCR accuracy.
Your plan's Upload Size limit applies to each page after it is prepared at the quality you chose, not to the original file. If you see File Too Large, try a lower quality.
PDFs
When you pick a PDF, FileFlow first turns it into pages, showing progress, the page count and the time remaining. You can Cancel the conversion.
- If a PDF has more than 50 pages, you see "This PDF is longer than one document". Import the first 50 pages imports only the first 50.
- A one-page PDF goes straight to the quality and rename steps.
- If there is more than one page, the Review PDF screen opens (or "Review 3 PDFs" when you pick several). Every page starts selected. Select a page to leave it out, or use Select All. Choose the Quality:, watch the counter of documents left in your limit, then select the import button, which shows the page count and estimated size. Pages you leave out are not saved. The button is disabled when there is not enough storage or the document limit is reached, and a message says what to deselect.
- If some PDFs cannot be converted, you see their names with Retry and Continue without. If none can be converted, you see "All PDFs failed to convert".
Scanning with the camera
The Scan button is on phones only, next to Upload. To scan a document:
- Select Scan and allow the browser to use the camera.
- Point the camera at the page. When "Document ready — tap to capture" appears, tap the capture button. You can turn on Flash if your device has one, or use Switch Camera.
- After each capture, Adjust Corners opens. Drag the four corners to the edges of the page and select Done, or Close to discard that capture.
- Capture the remaining pages the same way, then select Done.
- For one page, the Scan Document editor opens: Crop, Rotate left, Rotate right, Grayscale, Brightness, Contrast and Reset, plus Retake to shoot it again. Select Save.
- For several pages, Review Scans opens. Reorder with Move earlier and Move later, remove a page with Delete page, or Tap to edit one page. Global Adjustments applies grayscale, brightness and contrast to every page, and Add more takes you back to the camera. Then select Upload.
- Choose the quality, name the document and upload it.
A scan becomes one document however many pages it has (up to 50), and its suggested name starts with "scan" followed by the date and time. If the camera does not work, a message says why, such as Camera Access Denied, No Camera Found or Camera Not Supported, with Upload Files Instead.
Viewing documents
The viewer has two layouts. Switch with Switch to grid view or Switch to page view at the top of the screen. FileFlow remembers your choice.
Page view. One large page at a time. Move to the next page by swiping, with the arrow buttons or with the arrow keys. The bar underneath shows, for example, "Document 2 of 7" and the page number inside a multi-page document. You can zoom up to 5 times. Rotate turns the page on your screen only and is not saved. Info flips the page to show its name, type, size, date, category, keywords and recognized text, and View Document flips it back.
Grid view. One card per document, showing its first page and page count. Above the grid is the category bar: select a category to filter, or drag a card (or several selected cards) onto a category to move it there. Undo appears for a few seconds. Select a card to preview its pages. To select cards, Ctrl-click to add one, Shift-click to select a range, or long-press.
Documents panel. On a computer it sits beside the viewer. It has Upload, Details (the file's encrypted details), the document count, the sort button, Select and Add Category for people who can edit, then the category picker, the date filter and the search field, then the list of documents. Each row shows the document's name, type, page count and date, its text-recognition status, and a lock if access to it is restricted.
On a phone the viewer fills the screen. A small floating Documents button opens the panel as a sheet from the bottom, and the buttons at the top of the screen move into the More menu.
Categories inside a file
Categories are dividers that split a file's documents, such as invoices and contracts. The personal workspace owner, Admins and Editors can add and edit them. Only the personal workspace owner and Admins can delete them.
- Add: select Add Category, type a name, pick a color and select Create.
- Filter: select the category picker to open Categories: All Documents, then each category with its document count, then Uncategorized if some documents have no category. A search field appears when there are 6 or more categories.
- Edit or delete: from the category's row in the same list (Edit Category). Deleting a category does not delete its documents. They become Uncategorized.
- Assign: choose Category from a document's actions, select several documents and choose Category in the selection bar, or drag them onto a category in grid view.
New documents start without a category. When you search inside a file, results come from every category.
Document actions
You find a document's actions in three places: the Document actions button under the page in page view, the menu on each row of the documents panel, and the More menu on a card (or a right-click) in grid view.
- Download: a multi-page document downloads as one PDF built from its pages (Download PDF), and Download page downloads only the page on screen. A one-page document downloads as its image.
- Share document: in a personal workspace you choose between Share in FileFlow (with another FileFlow user) and sending the document through your device's share sheet. In an organization it opens the device share sheet directly. See the chapter Connections and sharing.
- Rename: up to 255 characters, and the name cannot be empty. Renaming a PDF renames all its pages together.
- Keywords: comma-separated words that help search.
- Category: moves the whole document into a category.
- Notes: written notes on the document. Everyone in the workspace sees them, and each person can edit or delete only their own.
- Comments: in organizations only. See the chapter Working with your team.
- Add Reminder: a reminder tied to this document, with a date and repeat.
- Assign task: in organizations, for Admins and Editors.
- Access Control: for the organization's creator only (see below).
- Up and Down: change the document's place in the file. The effect shows when the sort is Page Order, and they are hidden while you search.
- Make this page its own document: splits the page on screen into a new document named after the original plus "page" and its number. The new document counts toward your document limit.
- Delete this page: moves only the page on screen to the Trash. The rest of the document stays.
- Delete document: moves the document with all its pages to the Trash.
To select several documents, select Select in the documents panel. A bar appears with Download (one download per document), Category, Keywords (replaces the existing keywords on every selected document) and Delete. To combine documents:
- Select two or more documents, in the order you want.
- Select Combine into one document.
- Confirm. They become one document named after the first one shown, in the order shown. You can split any page out again later.
A combined document cannot exceed 50 pages. Otherwise you see, for example, "A document holds up to 50 pages; these have 62."
Who can do what
- Personal workspace owner and Admin: every action, including delete.
- Editor: add, edit, download, share, combine and split, but not delete. Trying to delete shows "You don't have permission to perform this action."
- Viewer: views documents, writes comments and notes, and adds reminders.
Deleting moves a document to the Trash, where you can restore it. Reminders tied to the document, however, are deleted for good and do not come back on restore. See the chapter Trash.
Restricting access. In an organization, the organization's creator can restrict a single document with Access Control in its row menu. There is a switch for each member, plus Enable All and Disable All, then Save. A member who is switched off does not see the document or its pages, including in search, and the creator sees a lock beside it. The creator "Always has access".
Plan limits
- Documents per file: Free 1, Pro 25, Business unlimited.
- Categories per file: Free 1, Pro 10, Business unlimited.
- Upload size per page: Free 2 MB, Pro 20 MB, Business 50 MB.
- Storage: Free 100 MB, Pro 2 GB, Business 5 GB. Storage is shared between your personal workspace and every organization you created.
- Pages in one document: 50 on every plan.
In an organization, the creator's plan limits apply to every member. When you reach a limit, a window such as "You've reached your Documents per File limit" shows your current use and upgrade options. If you pick more pictures than the limit allows, you see "Only 2 of 5 can be imported (document limit)" and only those that fit are uploaded.
Text recognition and search
FileFlow reads the text written on your document pages (text recognition, shown in the app as OCR) and lets you search it along with item names, file codes and keywords. This chapter explains how reading works and its monthly allowance, then the different ways to search.
Text recognition
Text recognition (OCR). Reading the words in a page image and keeping them as searchable text. FileFlow reads Arabic and English together, and starts on its own after every upload, scan or import, page by page.
- Reading runs in your browser, on your device, so keep the page open until it finishes. A progress card appears on whatever screen you are on, titled Reading text or Processing document, with the number of pages done. You can Cancel reading or Dismiss the card.
- If you close the page before reading finishes, FileFlow continues when someone who can edit opens the file.
- Image quality affects accuracy. That is why Upload Quality shows the expected OCR accuracy for each option (see the chapter Documents and scanning).
- A page where FileFlow finds no readable words gets the status OCR not available.
Once a page is read you can search its content, see matching words highlighted on the page, read its OCR Text on the page's info side (the Info button), and get tag ideas for the file from Suggest Tags at the top of the viewer.
Monthly allowance and who pays
Reading is counted per page, and a page counts only if its text was actually read. Blank pages and pages that could not be read are not taken from your allowance.
- OCR pages per month: Free 3, Pro 100, Business 500.
- On paid plans you can raise the allowance with an add-on of 50 pages a month (see the chapter Plans and billing).
- In an organization, pages come out of the organization creator's allowance, whichever member uploaded them.
- The allowance renews on the 1st of each month (UTC).
When the allowance runs out. FileFlow does not refuse the pages. Each page is saved in full, and you can view and download it, but it has no text and shows Kept without text (monthly OCR limit). A message tells you how many pages were kept without text and when your allowance renews, with an Upgrade button, and the same banner appears at the top of the file. When allowance is available again (a new month, an upgrade or an add-on), a banner at the top of the file says how many pages are waiting for OCR, with Read now to read them.
Reading status and retrying
Each document in the documents panel shows a status line:
- OCR pending: waiting in the queue.
- OCR processing: being read now.
- OCR complete: done.
- OCR failed - tap to retry: reading failed.
- Kept without text (monthly OCR limit): the allowance ran out.
- OCR not available: no readable words were found.
To read again:
- One document: tap the status line in any of the last three states, or choose Retry OCR from a card's menu in grid view when reading failed.
- All pages of a file: select Retry in the failed-pages banner at the top of the file.
- The whole workspace: in Action Items on the home screen, choose the item for pages that could not be read. Failed OCR Scans opens with a Retry All button.
Text that was read before is never erased by a failed new attempt.
Reminders from dates. After reading, FileFlow looks for important dates in the text, such as expiry, due or renewal dates, in Hijri or Gregorian. If it finds any, Smart Reminders opens with the suggested dates. Edit any of them, then select Create Selected or Skip All. FileFlow suggests each document's dates only once.
The Search page
The Search page searches the whole current workspace: projects, subjects, sub-subjects, 2nd sub-subjects, files and documents. To get there:
- On a computer: the Search icon at the top of the home screen.
- On a phone: the Search card in the home screen's quick actions.
- From the command palette: choose Full Search.
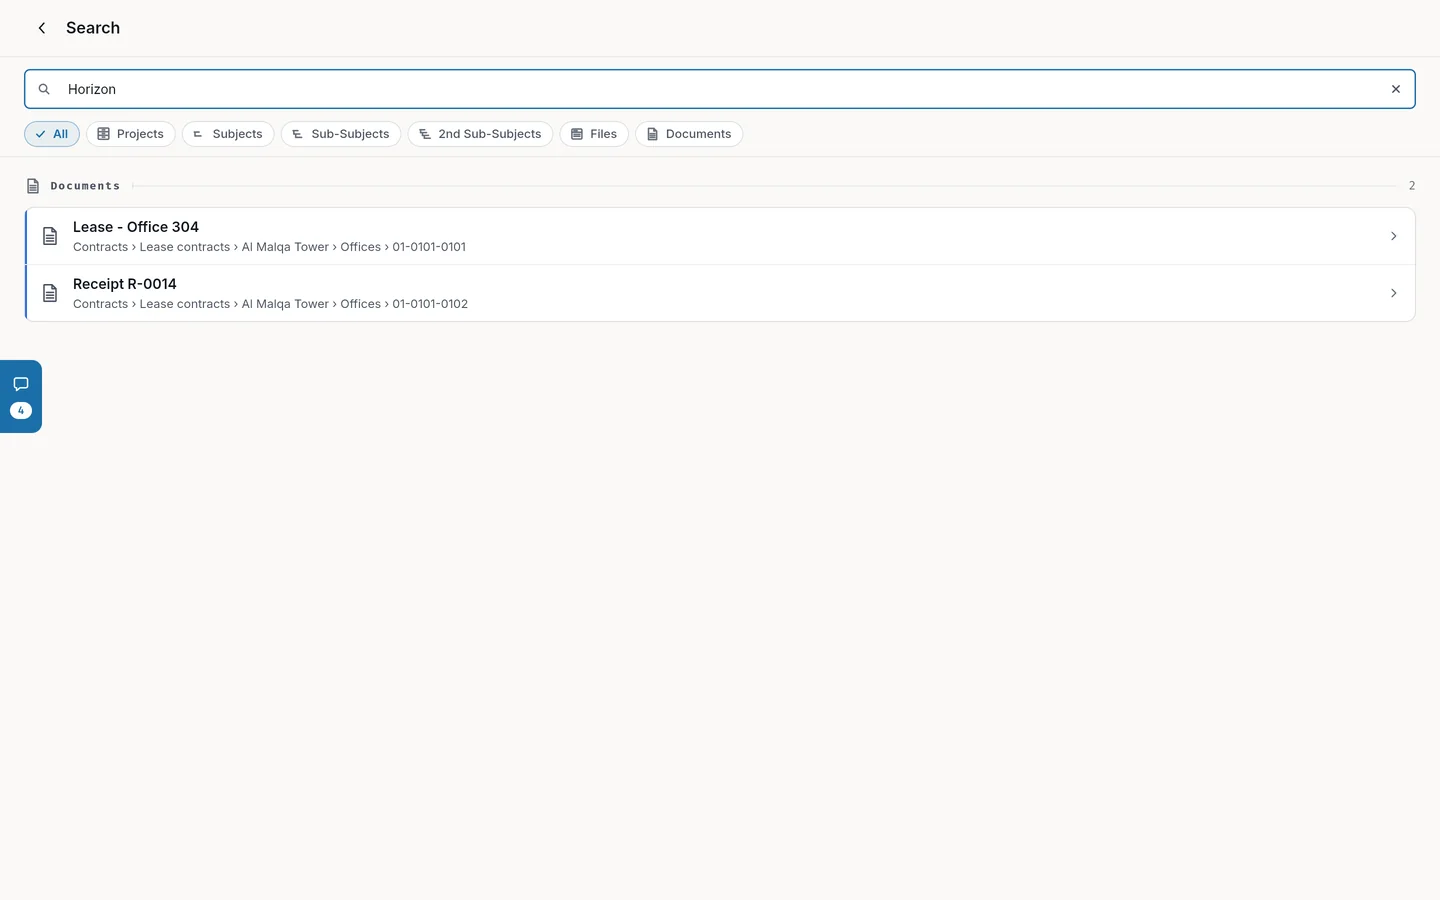
Type in the field and results appear as you type. Under the field are the filters All, Projects, Subjects, Sub-Subjects, 2nd Sub-Subjects, Files and Documents. You choose one at a time. Results are grouped by level with a count for each group, and each row shows its path. A file's row is titled with its code (such as 01-0102-0301), and a document's row with its name. A multi-page PDF appears as one result. Searches from this session appear under Recent Searches, and Clear All removes them. Pressing Esc empties the field.
Choosing a result opens it. A file opens in the document viewer with your search words already in its search box, so the matches are highlighted. A document opens its file at that exact document.
If nothing matches, you see No Results and "Try a different search term".
What search covers
- Projects: name and number.
- Subjects, sub-subjects and 2nd sub-subjects: their name and the names of the levels above them.
- Files: the file code (or any continuous part of it, with the dashes as printed), the file type, the names of the levels above, and the file's first detail.
- Documents: name, keywords, the names of the levels above, and the recognized text of every page.
Search does not cover tags, comments, notes, reminders or anything in the Trash. In an organization, items whose access is restricted from you do not appear.
How matching works:
- Every word you type must appear in the item, and part of a word is enough: "inv" finds "invoice".
- Capital and small letters are treated the same.
- In Arabic, search ignores diacritics and treats أ, إ and آ as ا, ة as ه, ى as ي, and ؤ as و. Type numbers the way they are stored: 12 does not match ١٢.
- Because the names of the levels above are part of a file's and a document's searchable text, searching a project's name also lists everything inside it.
FileFlow prepares search in the background a few seconds after you sign in or switch workspace. If you search before it is ready, you see "Searching documents..." and results may be fewer and will not include recognized text. Search again after a moment.
The command palette
The command palette is a quick search window. Open it with Ctrl+K on the home screen (Ctrl on a Mac too), from Quick Search in the home screen menu on a phone, or from the large search bar in the Focus home layout.
- With the field empty, it shows shortcuts: Quick File, Full Search, Dashboard and Settings.
- As you type, it shows the first 8 results, ordered by level from projects to documents, with no filters.
- Move with the arrow keys, open with Enter, and close with Esc or by pressing Ctrl+K again.
Choosing a project or a file opens it directly. To reach a particular subject, a document inside its file, or to see every result, use Full Search.
Searching inside a file
In the document viewer, the Search documents... field searches the documents' names, keywords and recognized text. Matching words are highlighted on the page, the bar shows, for example, "Match 1 of 4", and the list shows snippets of text around the word. Search covers every category, but the date filter stays on. Under the field are suggestions from the keywords. Select one to search for it.
Date filter. Select Date filter, choose under FILTER BY between Upload date and Document date, then pick a preset such as Today, This week, This month or This year, or Custom range… to pick a start and end on a calendar. Clear removes the filter. For documents you upload, the document date is the day you uploaded them.
Sorting. The Sort button in the documents panel orders the documents: Page Order (the file's own order), Newest First (the default), Oldest First, Name A-Z, Name Z-A, Type (A–Z) when there is more than one type, and Category (A–Z) when there is more than one category. Your browser remembers the choice, and the pages inside a document always stay in order.
The All Documents page
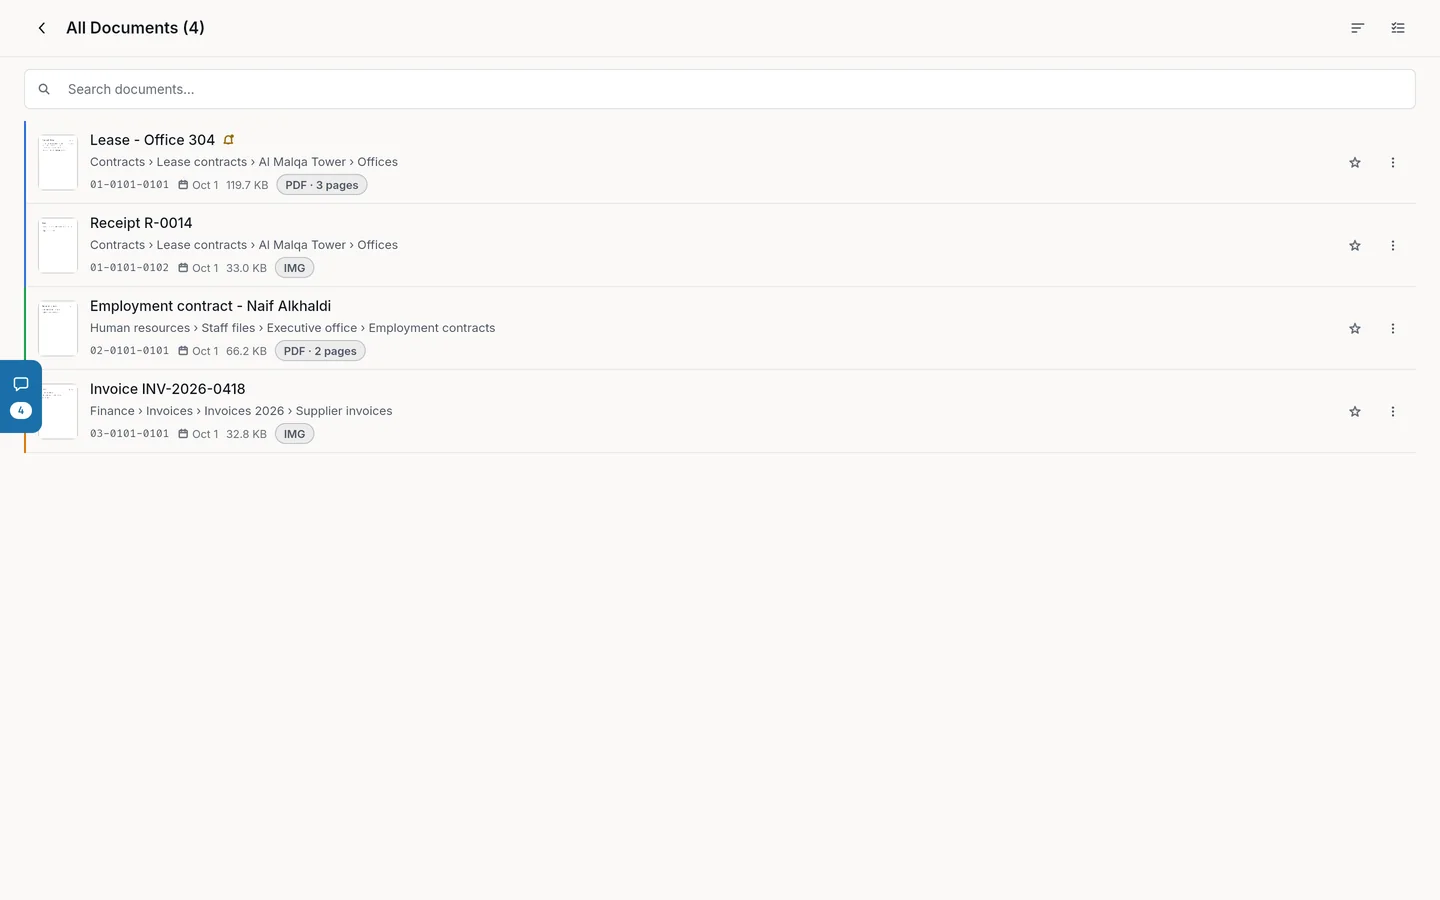
The All Documents page lists every document in the workspace, one row per document. Open it by selecting the Documents count in the home screen statistics or on the Analytics page.
- The Search documents... field searches names, keywords, the recognized text of every page, the file code and the names of the levels the document sits in. The text loads after the list, and while it loads you see "Still reading inside documents" with a count.
- The Sort button offers Number 1-9 (the default), Number 9-1, Favorites, By Tag and By Type.
- Select a document to open its file at that document.
- The row menu has Tags for people who can edit, Access Control for the organization's creator, Share, and Move to Trash for the personal workspace owner and Admins.
- You can select several documents to tag them or move them to the Trash together.
Trash
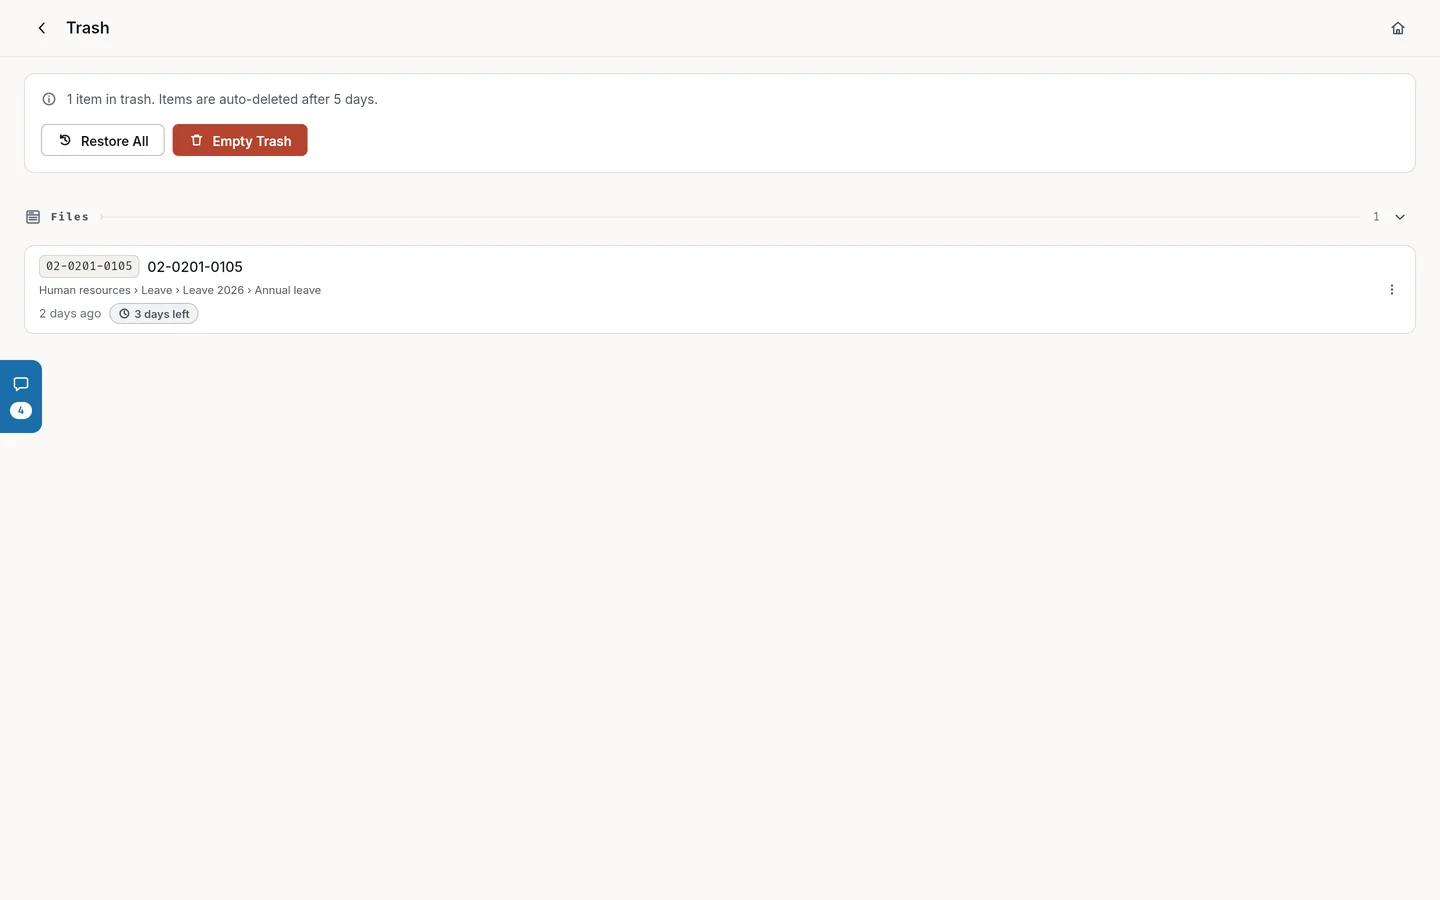
Deleting in FileFlow does not erase anything straight away. Whatever you delete moves to the Trash and stays there for 5 days, during which you can restore it. After that it is deleted for good.
Who can use the Trash
- In a personal workspace: you, always.
- In an organization: the organization's creator and Admins only. Editors and Viewers cannot delete and do not see the Trash.
Open the Trash from the Trash icon at the top of the home screen on a computer, from the home screen menu on a phone, or from Settings, row Trash. In an organization, the Trash shows everything deleted in the organization, whoever deleted it, and does not show who did.
What goes to the Trash
Any level you delete goes to the Trash: a project, subject, sub-subject, 2nd sub-subject or file, a whole document, or a single page of a document. Each delete asks you to confirm, for example "Move to Trash?". The Quick Files project cannot be deleted. Trying shows "This project is part of FileFlow and cannot be deleted."
When you delete an item, everything inside it goes with it at the same moment: the levels under it, their files and their documents. Each of them appears in the Trash as its own row in its own section, so deleting one project can fill the Trash with dozens of items, and the item count at the top includes them all.
These are deleted for good the moment an item goes to the Trash, and do not come back on restore:
- Reminders on every file inside the deleted item, and on a deleted document.
- Cross-references between those files and any other file.
- Those files' places in office layouts.
File details, categories, comments, tags, favorites, shares and links with other KERN products such as Aqarly stay, and come back as they were when you restore.
While an item is in the Trash:
- It cannot be opened. Links to it show "This is in the Trash. Restore it to open it."
- Nothing can be added into it or moved into it. You see "The file or folder you're adding to is in the Trash. Restore it first, then try again."
- It does not appear in search, lists or counts.
- If it was shared with someone, it disappears from their Shared with me page and comes back if you restore it.
- Its documents still count toward your storage. The top of the Trash shows "Trash is using" and the size. To free the space, delete them permanently.
The Trash page
At the top is a summary card: the number of items in the Trash, a note that items are deleted automatically after 5 days, the storage they use, and the buttons Restore All and Empty Trash.
Below it are sections in this order: Projects, Subjects, Sub-Subjects, 2nd Sub-Subjects, Files, Documents. You can collapse or expand any section, and the most recently deleted items come first. Each row shows:
- The code (the file code for files and documents, and the part of it that applies to higher levels).
- The name, and where it was before it was deleted.
- What it contains, such as "Contains 3 files, 12 documents".
- When it was deleted, such as "Just now" or "1 day ago".
- The days left before it is deleted for good, which changes color when 2 days or fewer remain.
A multi-page PDF is one row. A single page deleted from a document that still exists reads, for example, "Page 3 of “Contract”". Rows cannot be opened. The actions are in the More menu beside each row: Restore and Delete permanently.
On a phone, pull the page down to refresh it.
Restoring
To restore an item:
- Open the Trash.
- Select More beside the item.
- Choose Restore. When it succeeds, you see "Item restored".
What a restore brings back:
- The item and everything deleted with it at the same moment. Anything you deleted from inside it earlier stays in the Trash on its own clock.
- If the item sits inside a level that is also in the Trash, FileFlow restores the levels above it, up to the project, so the item has a place to go. Those levels come back on their own, and the rest of their deleted contents stays in the Trash.
A restore can be refused for two reasons:
- The number is taken. If, after deleting, you created an item with the same number in the same place, you see "Cannot restore — number 03 is already in use. Rename or delete the existing item first." Change the existing item's number or delete it, then try again.
- Plan limit. If restoring would go past your plan's limits, you see "Cannot Restore — Plan Limit Reached" with a line for each limit. In your personal workspace, and for the organization's creator, there is an Upgrade Plan button. An Admin in an organization sees "Contact your organization owner to upgrade the plan."
Restore All brings back everything in the Trash after you confirm "Restore All?", and checks plan limits the same way. If it fails, you see "Failed to restore" with the reason.
In an organization, the activity log records every restore from the Trash.
Deleting permanently
Deleting permanently cannot be undone. To delete an item permanently:
- Select More beside the item and choose Delete permanently.
- Read "Permanently Delete?" and confirm with Delete Forever.
This deletes the item and everything under it, along with its images, shares, tags, favorites, comments, details, categories, reminders, tasks and access restrictions. A document is deleted with all its pages that are in the Trash.
Empty Trash permanently deletes everything in the Trash after you confirm "Empty Trash?". In an organization, that includes everything its members deleted.
Links with KERN products. If another KERN product, such as Aqarly, files its documents into the folder or into something inside it, FileFlow warns you before deleting permanently: the links will be removed, and every record in that product will have to be pointed somewhere new by hand. Choose Delete permanently to go ahead or Leave it alone. If the link check cannot run, you see "The link check did not answer", and deleting is only possible after Try the check again. See the chapter Security and your account.
Automatic deletion after 5 days
Each item in the Trash has 5 days, counted from the moment it was deleted, and its row shows the days left. When they run out, FileFlow deletes it for good in an automatic daily cleanup, together with everything under it, just like a manual permanent delete. An item you deleted before the item that contains it is deleted on its own date, and when a higher item is deleted, everything inside it goes with it.
If you need something, restore it before its days run out. Nothing can be recovered after a permanent delete.
Connections and sharing
Sharing lets another FileFlow user see part of your personal archive without moving it or giving them a copy. You can share only with accounts you are connected to, so you start by adding the person to your Connections, then share what you want and decide how long the share lasts and what they may do.
Sharing with connections is available only in your personal workspace. Inside an organization items have no Share option, because members see the organization's content according to their role (see the chapter Organizations, members and roles).
Your user ID
Every account has a 10-digit user ID, created when you sign up. You find it at the top of Settings, on your profile card. Tap the ID to copy it (you see UID copied), then send it to the person who wants to add you. Next to it, the Connections button opens the Connections page.
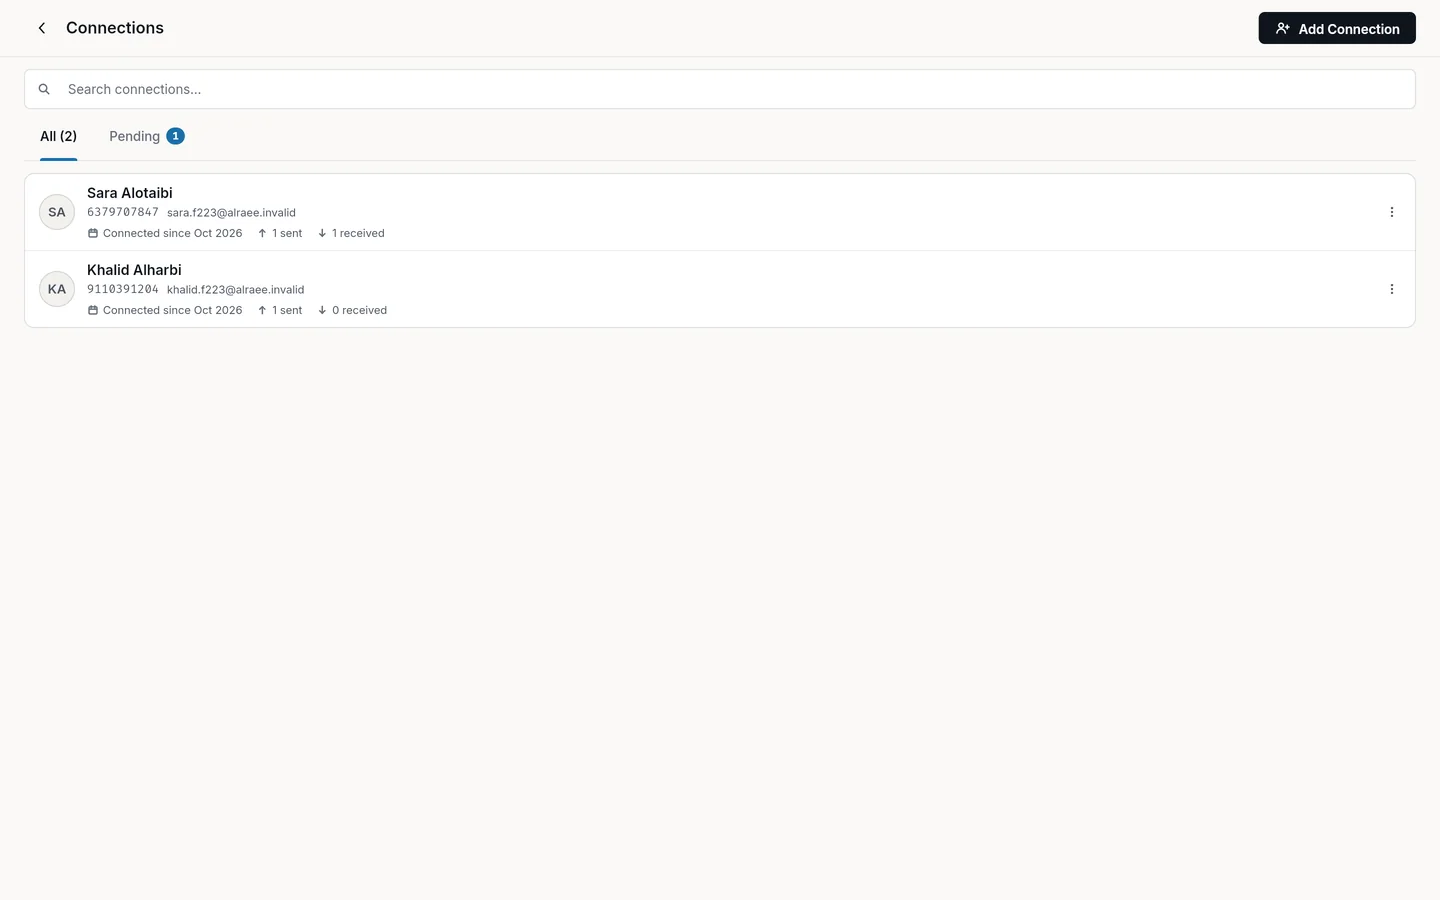
The Connections page
You reach the page from the Connections button in Settings, from the Connections button on the Shared with me and Shared by me pages, or by tapping a connection request or acceptance notification.
- The All tab lists your accepted connections, with their number.
- The Pending tab lists requests sent to you that are waiting for your answer, with a count beside it.
- Search connections... matches name, ID or email.
Each connection shows the person's name, ID and email, Connected since and a date, and how many active shares you have with each other in each direction (sent and received). The row menu has Copy UID and Remove connection.
To add a connection:
- Select Add Connection. On a computer the button is at the top of the page; on a phone it is the floating + button at the bottom of the screen.
- Enter the person's ID in 10-digit User ID. The field accepts digits only.
- Select Send Request. You see Connection request sent, and the other person gets a Connection Request notification.
Requests you send do not appear on your own page; they appear in the other person's Pending tab. If the request cannot be sent, you see one of these messages:
- No user has that ID. Check the number and try again.
- You can't connect with yourself.
- You've already sent this person a request.
- This person has already sent you a request. Accept it from your connections.
- If you enter fewer than 10 digits, a warning repeats the field name, 10-digit User ID.
Accepting, rejecting and removing
In the Pending tab each request shows the sender's name and ID with Accept and Reject. When you accept, the person moves to the All tab and gets a Connection Accepted notification. When you reject, the request leaves your list and the sender is not notified.
Either of you can remove a connection: in the row menu choose Remove connection, then Remove. Removing a connection immediately revokes every share between the two of you, in both directions, and cannot be undone. To share again later, you need to connect again and share again.
Sharing an item
You can share any level of your personal archive: a project, subject, sub-subject, 2nd sub-subject, file or document. Sharing a level means the other person sees that item and everything inside it. You can share only what you own, and only with accepted connections.
To share:
- In your personal workspace, open the item's menu and choose Share. For a document, open the file and select Share document under the page on screen or in the document's menu, then choose Share in FileFlow. You can also share a document from the All Documents page.
- Pick the person in Share with. If you have no connections, the dialog says No connections yet. Add connections in Settings.
- Choose the Validity: 1 Day, 7 Days, 30 Days, 90 Days, Unlimited (the default) or Custom. With Custom you pick a day from tomorrow up to 5 years ahead, and the share ends at the end of that day.
- For a file or document only, set what is allowed: Allow download (on by default; the recipient can always view in the app) and Allow info (off by default; lets the recipient see the document's details and metadata).
- Select Share. You see a success message, and the recipient gets an Item Shared notification.
Sharing a document shares all of its pages, whichever page was on screen. When you share a project, subject or sub-subject, download is always allowed and info is never shown, and the two switches do not appear.
Rules to know:
- If a level above the item is already shared with the same person, the share is refused, because they can already see it.
- If you share a higher level, narrower shares inside it with the same person are removed automatically, because the new share covers them.
- You cannot share the same item with the same person twice, even when the first share has expired. To renew an expired share, revoke it in Shared by me first, then share again.
Shared with me
Open it from the Shared with me card on the home screen of your personal workspace, or by tapping a share notification. It lists only active shares, grouped by level, with filters by person (All plus one button for each person who shared with you).
Each row shows the item's name, Shared by and the owner's name, and how long the share has left, for example No expiry or Expires soon. If the owner did not allow download, a View only tag appears.
Tap an item to open it read-only inside the owner's structure. You cannot change anything, and download buttons appear only if the owner allowed them. If the share expires or is revoked in the meantime, you see This share has expired or been revoked; if the item was deleted, you see Item no longer available. The owner can see how many times you opened the item and when you last did.
To remove an item from your list, choose Remove in the row menu and confirm. After that you can no longer open it, the share also disappears for the owner, and it comes back only if they share it with you again.
Shared by me
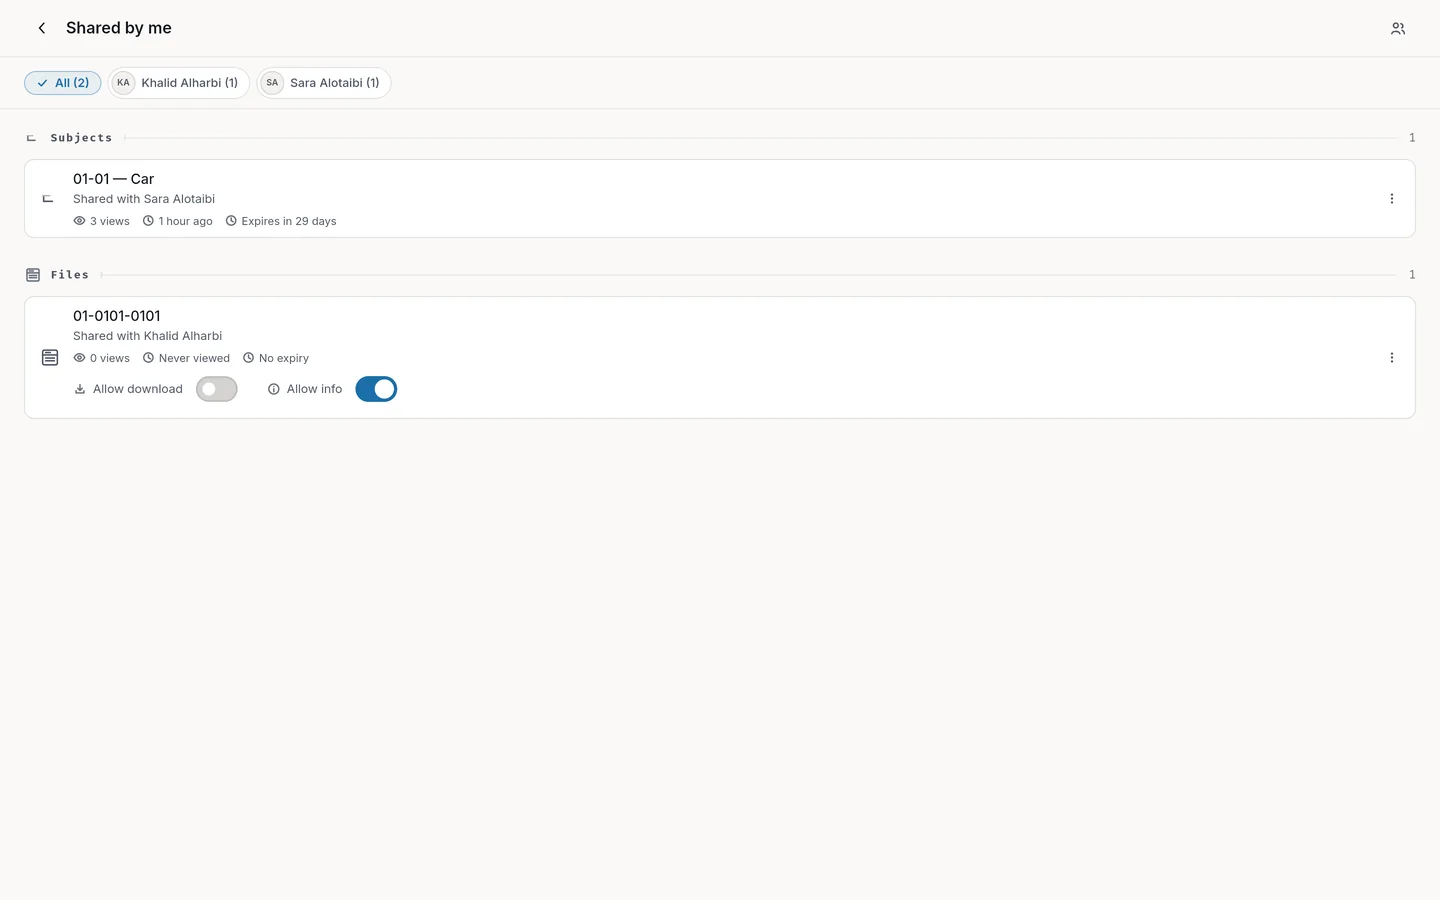
Open it from the Shared by me card on the home screen of your personal workspace. Each row shows the item's name, Shared with and the person's name, the number of views and the last view (Never viewed if they have not opened it yet), and the validity. Expired shares stay listed here in red until you revoke them.
- For a file or document share, the row has Allow download and Allow info switches that you can change at any time.
- If you move the item to the Trash, the row shows In the Trash and They can't see it while it's in the Trash.
- To revoke a share, choose Revoke in the row menu and confirm in the Revoke Share? window. The recipient loses access at once, and narrower shares inside that item with the same person are revoked with it.
Plan limits
- Free: 3 connections and 3 shares a month.
- Pro: 50 connections and 100 shares a month.
- Business and Enterprise: unlimited connections and shares.
Only accepted connections count. Shares are counted per calendar month, and revoking a share does not give it back to the month's count. When you reach a limit, a window titled You've reached your ... limit names the limit and offers an upgrade. When you are close to the monthly share limit, a note appears in Action Items. Plan details are in the chapter Plans and billing.
Sending a copy outside FileFlow
FileFlow has no public share links. To send a document to someone without an account, open the file and select Share document under the page on screen or in the document's menu, then choose Share document again in the Share window. In grid view, Share in a document card's menu sends the copy directly. FileFlow hands a copy of the document to your device's share menu; a document with several pages is sent as one PDF. If your device has no share menu, the file is downloaded instead. What you send this way is an independent copy, so you cannot revoke it later. Inside an organization this is the only share option, and it opens your device's share menu directly.
Organizations, members and roles
An organization is a shared workspace for your team. It has its own archive of projects, files and documents, separate from your personal workspace, and each member works in it according to their role. This is where you create an organization, invite members, set their roles and give it its look.
Plan requirement and limits
Creating an organization needs the Business or Enterprise plan. On Free and Pro, the create button opens a window titled Organizations are a Business Feature, with an upgrade button.
- Business: up to 3 organizations, each with up to 5 members.
- Enterprise: up to 5 organizations, each with up to 10 members. More organizations and members can be added through add-ons arranged by your account manager (see the chapter Plans and billing).
The creator counts as a member, so a Business organization holds the creator and 4 others. Pending invitations do not count until they are accepted. The number of organizations is always measured against your own plan, wherever you are.
An organization runs on its creator's plan: every limit and feature inside it comes from that plan, and Settings shows Org Plan and the plan's name. Members can join on any plan, including Free. The organization's documents count against the creator's storage, and pages read for text inside the organization count against the creator's monthly allowance. When a member reaches a limit inside the organization, they see Contact your organization owner to upgrade the plan. instead of upgrade buttons.
Creating an organization and switching workspaces
- Tap the workspace logo at the top of the home screen to open Workspaces, then select Create Organization. You can also start from Manage Organizations in Settings.
- If you already own an organization, Reuse existing branding copies its logo, name style and colors; or choose Start fresh.
- Enter the Organization Name (required, up to 60 characters), a Subtitle (optional) (up to 40 characters) and a Description if you want one.
- Select Create. You see Organization created, you are moved into the new organization, and then to Theme & Branding to set its look.
The Workspaces window lists your Personal Workspace, then My Organizations (the ones you created, marked Creator), then Joined Organizations with your role in each, then Pending Invitations. Tap a row to switch to it. Each organization has a settings button that opens its settings page. On a phone the window opens as a panel you drag up from the bottom of the screen.
Inviting members
Only the creator and admins can invite members.
- Open the organization's settings, then Members, then select Invite Member.
- Enter the Email and choose a role under Select Role: Admin, Editor (the default) or Viewer. Then select Next.
- Choose the email language: the invitation is always sent in both languages, and Both languages, starting with: sets which comes first. The page shows The email, as it will arrive.
- Add a Personal message (optional) if you like (up to 300 characters), then select Send Invitation. You see Invitation sent to and the address.
If the address belongs to a current member, you see that they are already a member of this organization and nothing is sent. If they already have a pending invitation, you see that message with Send Anyway. If the organization is full, the limit window appears before the invitation page opens.
What happens next depends on the person:
- They have a FileFlow account: they get an email with a button to open FileFlow and accept, and an Organization Invitation notification in the app. They answer from the Workspaces window or the Organizations page with Accept or Decline. When they accept, they are moved straight into the organization and admins get a New Member notification. When they decline, the person who invited them gets an Invitation Declined notification.
- They have no account: they get an email with a button to create an account and accept, and the invitation is valid for 7 days. They sign up with the same address and become a member as soon as they first sign in. The Free plan is enough.
On the Members page the creator and admins see a Pending Invitations section with a count. Each invitation shows Registered user or Not registered, and the time left for people without an account. To cancel one, choose Cancel Invitation in its menu and confirm; you see Invitation cancelled.
Roles and permissions
Each member has one role in the organization. The creator is the person who created the organization; their role is Admin, with extra rights nobody else has.
Creator. Everything an admin can do, plus: hiding items from specific members, granting the Admin role when changing a member's role, managing any member including admins, and deleting the organization. The organization's plan and billing are theirs. The creator's role cannot be changed, they cannot be removed, and they cannot leave.
Admin. Creates, edits, moves and deletes items, opens the Trash and restores from it, imports and exports, prints QR codes and stickers, and manages file types and office layouts. Invites members and cancels invitations, changes Editors and Viewers to Editor or Viewer and removes them, but cannot manage another admin. Edits the organization's name and description, sets Theme & Branding, turns the Chat Room on or off, and deletes entries from the activity log.
Editor. Creates, edits and moves items, but cannot delete. Cannot open the Trash, import, export or print, and cannot manage file types, office layouts or members. Can assign tasks.
Viewer. Views items only, without creating, editing or deleting anything. A Viewer who needs to edit asks the creator or an admin for a different role.
Every member, Viewers included, can write comments, take part in the Chat Room, and see the activity log and the organization's task list (see the chapter Working with your team).
Changing a role and removing a member
On the Members page, open a member's menu and choose Change Role or Remove Member. The creator can do this for every member; an admin only for Editors and Viewers.
- When a role changes, the member gets a Role Changed notification.
- Removing asks for confirmation in the Remove Member? window. The removed member is moved to their personal workspace at once and sees You have been removed from this organization.
- An organization must keep at least one admin. If you try to remove, demote or leave as the last admin, you see An organization needs at least one admin. Make another member an admin first.
Hiding items from specific members
Only the creator can hide a project, subject, sub-subject, 2nd sub-subject, file or document from particular members. Hiding applies to admins too; only the creator always sees everything.
- Open the item's menu and choose Access Control.
- The creator is listed as Always has access, and every other member has a switch next to their name and role. Turn the switch off for the people who should not see the item, or use Enable All and Disable All.
- Save. You see Access updated, or Access restriction removed if everyone is allowed again.
A restricted item shows a lock in its menu. A member who is blocked at a higher level shows No access to and that level's name, and you cannot allow them here until the higher restriction is removed. To see everything hidden from one member, open their menu on the Members page and choose Manage Access; the Access for page lists every restricted item with a switch. When a member is removed or leaves, their restrictions are deleted.
Branding, organization settings and activity log
Theme & Branding is for the creator and admins, and applies to the whole app for everyone working in the organization. It has a Live Preview and four sections:
- App Logo: a square icon next to the organization's name (128 by 128 pixels recommended; PNG, JPG, JPEG and WEBP accepted). You can upload it, hide it with Remove, or go back to the FileFlow logo with Reset to Default.
- Text Logo: the organization's name in the app header, as Image, Text or Hidden. For text you choose the font, its weight, letter spacing and uppercase; the last two are turned off for Arabic text so the letters stay connected.
- Subtitle Text: a short line under the organization's name, with the same options.
- Colors: Primary Color and Secondary Color.
Select Save to see Theme updated successfully. If you leave the page before saving, the app asks about your unsaved changes.
The organization's settings page shows its logo, name and number of members. In Team and workspace every member finds Members and Activity Log; the creator and admins also find Theme & Branding and the Chat Room switch. The creator finds Edit Organization and Delete Organization under Creator; an admin finds Edit Organization under Admin; anyone who is not the creator finds Leave Organization under Actions. You reach the page from the settings button next to the organization in Workspaces; the creator and admins can also open it from the organization's row in Settings.
Every member can see the Activity Log: what was created, modified, deleted or restored from the Trash, comments, and where each item sits. Tap a line to go to the item. Entries are removed automatically after 72 hours. The creator and admins can delete one entry, or Clear All after confirming; this cannot be undone.
Leaving and deleting
Leaving. For any member except the creator: in the organization's settings choose Leave Organization, or use your own row's menu on the Members page. The Leave Organization? window warns that you will lose access to all organization data; select Leave. You are moved to your personal workspace. The last admin cannot leave before making someone else an admin.
Deleting. For the creator only: choose Delete Organization, then Delete. Everything in the organization is deleted: documents, files and every level, the branding, tasks and reminders, members and invitations, restrictions, the activity log and the chat. Deleting is final and does not go through the Trash. Every member gets a Workspace deleted notification.
Locked organizations
If the creator's plan allows fewer organizations than they own, the newest organizations over the limit become locked, for the creator and all their members. If the creator moves to Free or Pro, all of their organizations are locked.
- You cannot switch into a locked organization, and anyone inside it is moved to their personal workspace.
- The creator sees This organization is locked. Upgrade your plan or purchase an add-on to unlock. Members see This organization is locked by the owner's plan limit. Contact the org owner.
- Its settings rows are disabled and marked Locked, except leaving and deleting.
If an organization has more members than the plan allows, the most recently joined members are marked Locked on the Members page and cannot be managed. Upgrading makes everything available again, and raising a limit never locks anyone out.
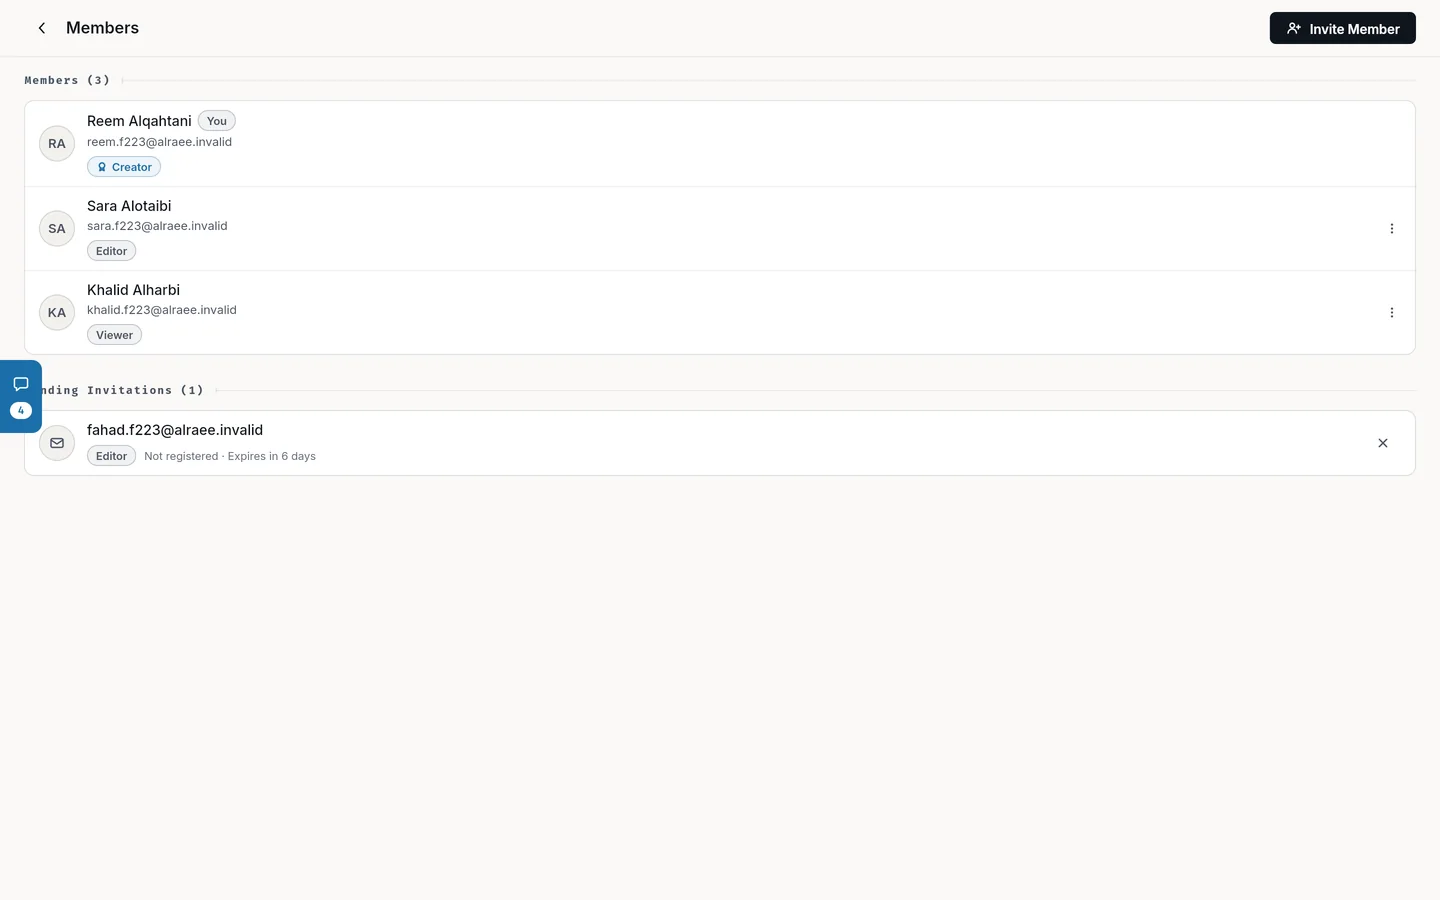
Working with your team
Inside an organization the team works on the same archive and talks about it without leaving FileFlow: a quick chat for the whole team, tasks tied to documents, comments on document pages, and notifications that tell each person what concerns them. Chat, tasks and comments exist only in organizations; they do not appear in your personal workspace.
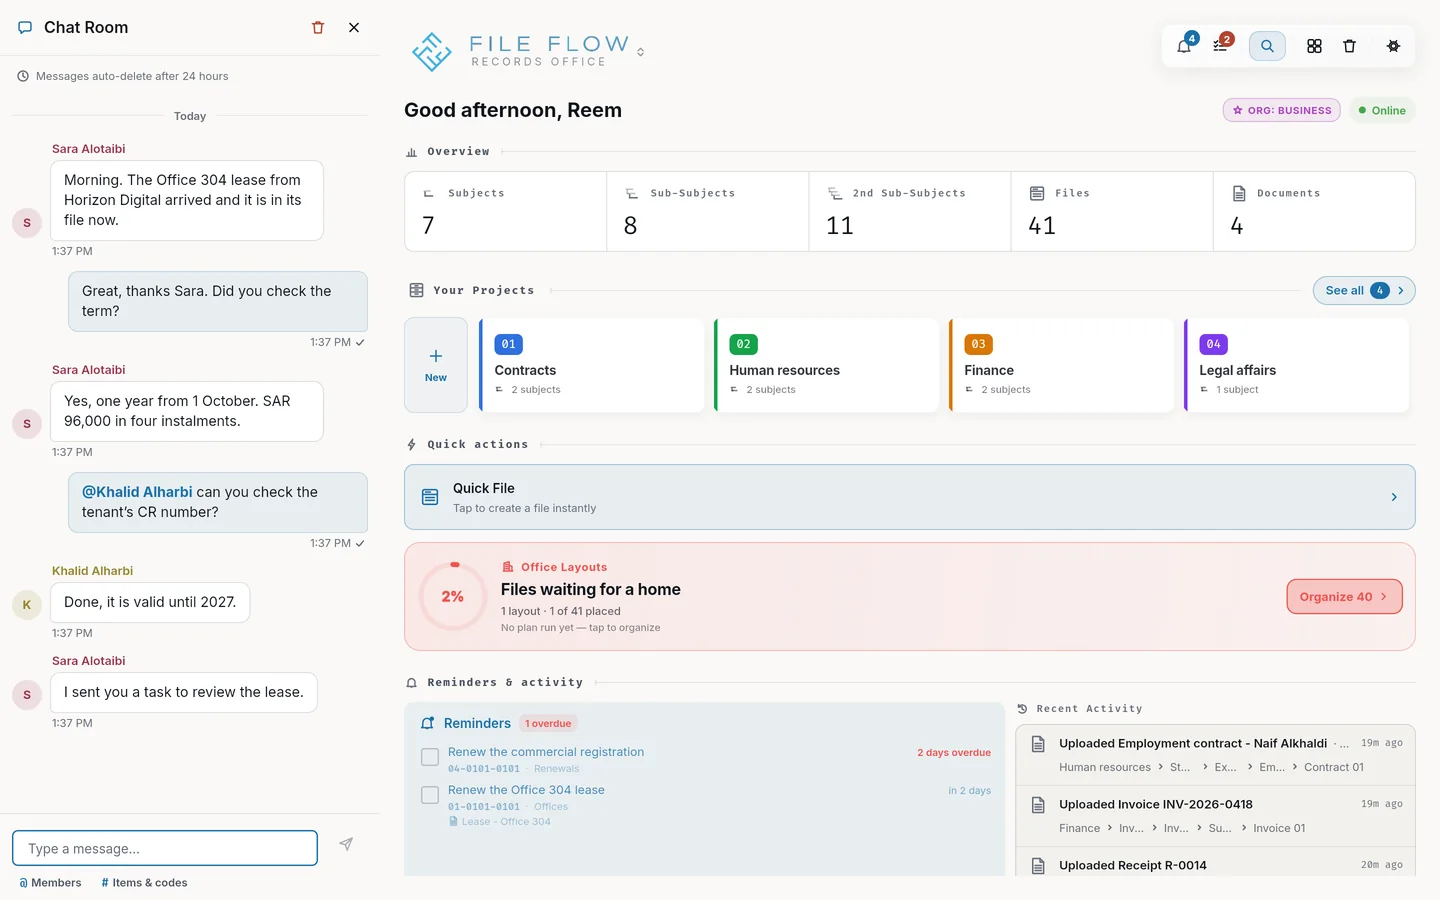
Chat Room
The Chat Room is a panel that slides over any screen in the organization. You open it from a small tab on the edge of the screen: on the left in English, on the right in Arabic. You can drag the tab up or down along the edge, and it shows the number of unread messages. On a narrow phone screen the panel covers most of the width. With a keyboard, Enter on the tab opens the panel and Esc closes it.
- Type in Type a message... and select Send. One message can hold up to 4,000 characters.
- Messages are deleted automatically after 24 hours, and a notice at the top of the chat says so. Do not use the chat to keep anything you need later.
- The chat shows who is typing, and a New messages divider marks what you have not read yet.
- If your message is not sent, you see Your message wasn't sent. It's back in the box: try again.
Every member of the organization can read and write in the chat, Viewers included.
To mention someone, type @ to open the Members list; the first entry, Everyone, mentions the whole team. A message that mentions you or everyone is highlighted with Mentioned you, and everyone mentioned gets a notification; the sender does not. Tapping a mentioned name does nothing.
To point to an item, type # to open Items & codes. Search projects, subjects, sub-subjects, 2nd sub-subjects and files by name, number or file code. Tapping the item in the message opens it. If it was deleted or you no longer have access, you see This is no longer available. It was deleted, or you no longer have access to it.
To delete a message, swipe it toward the end of the line, long-press it, or right-click it, then choose Delete. Each member can delete their own messages; the creator and admins can delete any message. They can also use Clear all messages after confirming Delete all chat messages? This cannot be undone.
Chat is on in every new organization. The creator and admins can turn it off in the organization's settings with the Chat Room switch. When it is off, the tab disappears for everyone.
Tasks
A task is a request for work on a specific document, assigned to another member of the organization. The creator, admins and Editors can assign tasks; Viewers do not see the option.
To assign a task:
- Open the file, open the document's menu and choose Assign task.
- Under Assign to, pick the member. The list holds accepted members other than you, so you cannot assign a task to yourself.
- Enter a Title (required) and a Description (optional).
- Choose the Priority: Low, Normal (the default), High or Urgent.
- Pick a Due date if you want one, from today up to 365 days ahead.
- Select Assign. You see Task assigned successfully, and the member gets a New task assigned notification.
On a phone the task form opens as a panel from the bottom of the screen. Every task starts as Needs Review. The statuses are Needs Review, In Progress, Action Required, Approved and Completed, and you can move to any of them in any order. A task whose due date has passed and is not completed is marked Overdue.
Who can do what:
- Every member of the organization can see tasks, Viewers included.
- The status can be changed by the person the task is assigned to, the person who assigned it, and admins.
- Only the person who assigned the task and admins can reassign or delete it.
- When the status changes, the person who assigned the task gets a Task updated notification; when a task is reassigned, the new member gets a New task assigned notification.
My Tasks opens from the organization's home screen. It has two views, each with its count: Assigned to me and Assigned by me, with status filters. Each task opens its document with Open document. Change the status with Change status when you are allowed to. In Assigned by me, a task's menu has Reassign and Delete.
Organization Tasks also opens from the organization's home screen, and every member can see it. It shows task counts By status at the top and can be filtered by Status, Assignee and Priority. You cannot change a status on this page; do that in My Tasks. If you assigned the task, or you are an admin, its menu has:
- Reassign: pick the new member; the current one is marked Current and cannot be picked. You see Task reassigned to and their name.
- Delete: confirm in the Delete Task window. Deleting is final and cannot be undone.
If a task changes or is removed while you are looking at it, you see This task was changed or removed. The list is up to date now. Overdue tasks also appear in Action Items on the home screen.
Comments
Comments are available on documents in an organization. In your personal workspace, Notes take their place (see the chapter Documents and scanning). Every member can comment, Viewers included.
Open the file and select Comments under the page on screen. On a computer the comments open in the side panel; on a phone they open in a panel from the bottom of the screen. Comments belong to the page you are looking at; when you move to another page, its comments appear.
- Type in Add a comment... and select Send. If the comment cannot be saved, your text stays in the box so you can try again.
- To reply, select Reply under a comment and type in Write a reply.... Replies go one level deep. To back out, select Cancel reply.
- To mention a member, type @ and pick their name. They get a notification; tapping it opens the document with the comments shown and the comment that mentioned them highlighted.
- To react, select Add a reaction and pick one of six reactions. Tap your reaction again to remove it.
- You can edit only your own comments: choose Edit in the comment's menu, and an (edited) mark appears next to it.
- You can delete your own comments, and the creator and admins can delete any comment. Deleting asks for confirmation and cannot be undone, and deleting a comment also deletes its replies.
Your own comments are labeled You; others show the author's name with the date and time. Comments are also recorded in the organization's activity log.
Notifications
The notifications bell at the top of the home screen tells you what concerns you. On a computer it opens a dropdown; on a phone, a panel from the bottom of the screen. Notifications belong to the workspace you are in: your personal workspace shows its own notifications and organization invitations, and each organization shows only its own.
Team notifications and what each one opens:
- Connection Request and Connection Accepted: open Connections.
- Item Shared: opens Shared with me.
- Organization Invitation: opens Workspaces so you can accept or decline.
- New Member: sent to admins when someone joins; opens Members.
- Invitation Declined: sent to the person who sent the invitation.
- Role Changed: opens the organization's settings.
- Workspace deleted: sent to the members of an organization its creator deleted.
- A chat mention: titled with the organization's name; opens the Chat Room.
- A comment mention: titled with the commenter's name; opens the document at the comment.
- New task assigned and Task updated: open the task's document.
Tapping a notification opens what it is about and then deletes it; if the target cannot be opened, the notification stays. Swipe a notification to dismiss it, or select Clear all to delete the current workspace's notifications only. Each new notification plays a sound, and the number on the bell is how many notifications you have. Notifications are deleted automatically after 24 hours, so open what matters to you the same day. When nothing is left you see All caught up!
Printing and QR codes
This part of FileFlow ties your digital archive to the paper files on your shelves. Every file has a QR code that opens it directly, and you can print coded stickers for your physical folders and a PDF list of your files.
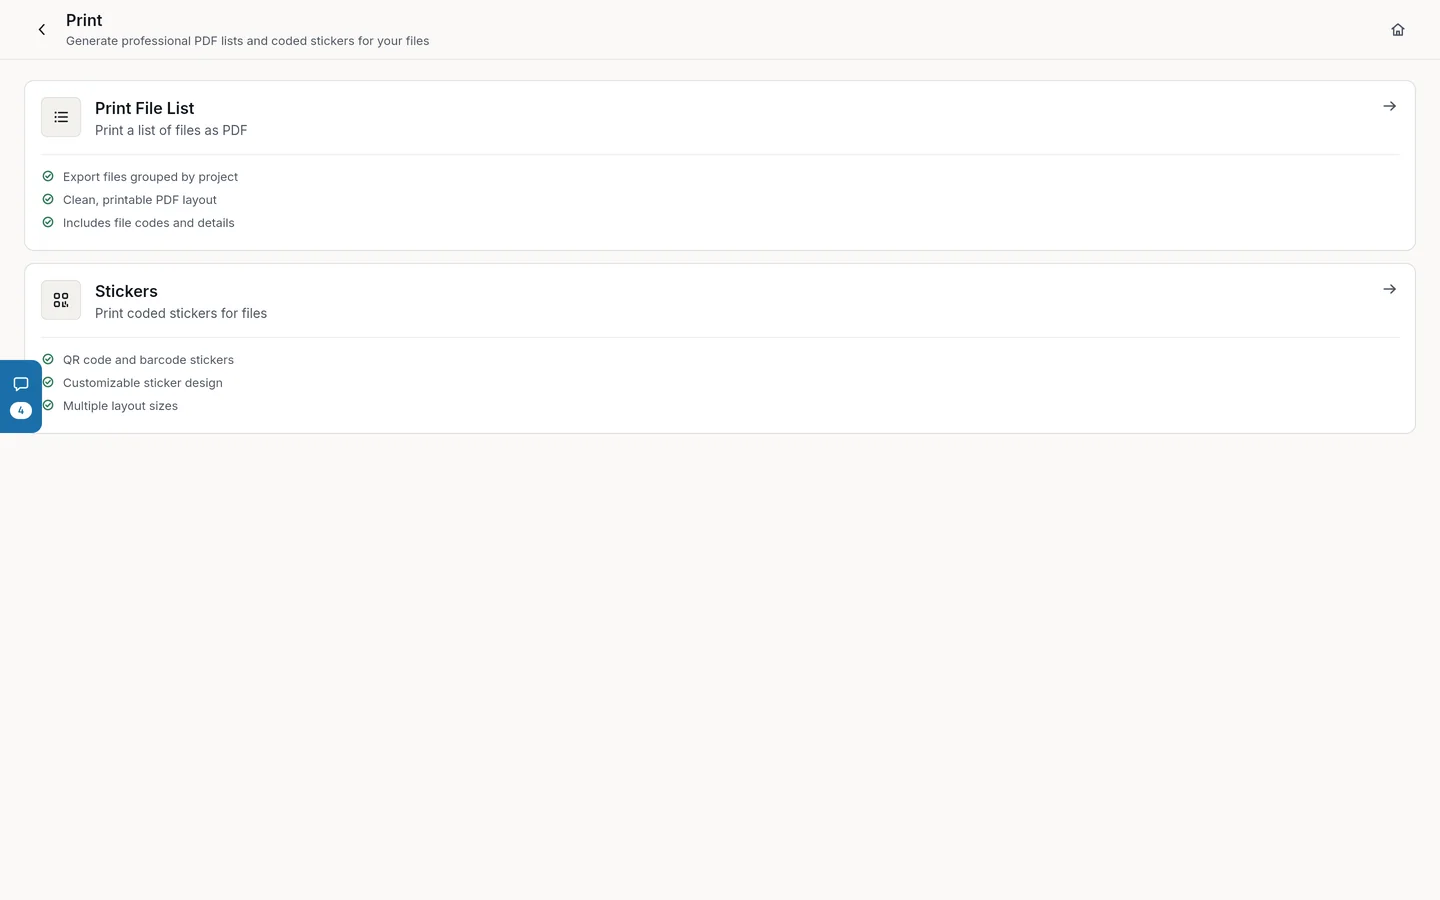
A file's QR code
Every file has its own QR code, which holds the file's FileFlow link. You find it in two places: in the file's menu in the files list, under QR Code, and in the file viewer's header, under the same name. The file's menu opens from the menu button on its row, with a right click, or with a long press on a phone.
The dialog shows the code dark on white, with the file's link and its 10-digit code. Press Copy Link to copy the link; "Link copied to clipboard" confirms it. Showing the code works on every plan, for anyone who can open the file.
Scanning the code with a phone camera opens that file in FileFlow. If you are signed out, FileFlow asks you to sign in first and then continues to the file. If the file is in another workspace, FileFlow switches to it. You may see one of these messages:
- "This file could not be found." when the file was deleted permanently or the link is wrong.
- "This file is in the trash. Restore it from the trash to access it via this link."
- "You don't have permission to access this file." when you are not a member of that workspace or the file is hidden from you.
- "This file belongs to a locked organization. Contact the organization owner to upgrade."
- "Failed to load file. Please try again." with Retry, and Go Home to leave.
The Print hub
Open Settings, then the Office group, then Print. The row is shown in your personal workspace, and to an organization's creator and its Admins; Editors and Viewers do not see it. Opening it needs the Pro plan or higher. On the Free plan the row shows as locked, and pressing it opens the upgrade dialog.
The Print page has two cards:
- Print File List: needs the Business plan or higher.
- Stickers: needs the Pro plan or higher.
File types and sticker design
Every file in FileFlow has a type, and every type has its own sticker size and design. You manage types in Settings, then Organize, then Manage File Types. The row is shown to the same people as the Print hub: your personal workspace, the organization's creator, and Admins.
The File Types page has two sections:
- System Templates: two templates FileFlow creates on your first visit, Hanging at 5 × 1.5 cm and Box at 5 × 15 cm. Their size cannot be changed, but you can edit their design or bring it back with Reset to default design, which discards your current design.
- Your Templates: the types you create.
To create a type:
- Press New File Type.
- Enter a Type Name, then the Width and Height, and pick the unit: pixels, centimeters, millimeters or inches. The default size is 300 × 100 pixels; the smallest is 50 pixels and the largest is an A4 page.
- Save. The sticker designer opens straight away.
If the name is taken, you see "A file type with this name already exists". The number of types you can create depends on the plan: none on Free, 1 on Pro, 3 on Business and 10 on Enterprise, on top of the two system templates. At the limit, the dialog "You've reached your Custom File Types limit" appears.
Each type's menu has Edit name/size, Design Sticker and delete. A type that files use cannot be deleted; a message tells you how many files use it. Deleting an unused type also deletes its sticker design.
Sticker designer. It needs the Pro plan or higher. It has three panels: Add Elements, Properties and Layers. The elements are: the project color; the number and name of each level (Project, Subject, Sub-Subject and 2nd Sub-Subject); the file number; the full file code; your own text; an image (at most 2 per design); a color fill; a line; and a QR code that holds the file's link. You can drag and resize elements, reorder them with Bring forward and Send backward, and change font size and color and the QR code's colors. Press Save when you are done. On a phone, the panels open from the floating Elements and properties button.
Printing stickers
- On Print, choose Stickers. The Print Stickers page opens.
- Your files are grouped by type. Search by file code or by project, subject or type name, or filter by type.
- Select files one by one, a whole type group, or Select All.
- Press Generate with the sticker count.
Generation runs in the background: "Generating stickers…" appears and you can keep working on other pages, or press Cancel to stop it. When it finishes, a "Stickers ready" bar appears with Open PDF. Each sticker uses its file type's design and carries the file code in the form PP-SSBB-DDFF. Stickers are laid out on A4 pages, in whichever orientation fits more of them.
With no file types you see "Create file types in Settings first"; with no files, "Create files in your filing hierarchy first".
Printing a file list
This needs the Business plan or higher. On Print, choose Print File List, then set:
- Select projects: all projects by default, or the ones you pick.
- Placement: Any, files that are Placed on an office layout, or Not placed.
- File types: one or more types.
- Presentation: Sort by hierarchy or file code, and Group by project or location.
- Output options: Include documents lists document names under each file; Include file dates; and Watermark, for example CONFIDENTIAL. Leave it blank for none.
Press Generate PDF. A progress dialog appears, which you can cancel; the file then downloads and "PDF downloaded" confirms it. If nothing matches your choices you see "No files to print". If the PDF cannot be made, an error message appears; try again.
QR codes on office furniture
If you have drawn your office in Office Layouts (see the chapter Office layouts and locations), you can print a QR code for every piece of furniture. In the layout's menu, choose Print QR stickers. A PDF downloads with one sticker per piece, 12 to an A4 page, with the organization's logo and color. This menu is for the people who manage layouts: your personal workspace, the organization's creator, and Admins. To print one piece's sticker, open the piece in View Mode and press Print this QR sticker at the top of its files list.
Scanning a furniture code opens the list of files in that piece, with a search box. You must be signed in; otherwise you see "Sign in to view this cabinet's files." If the piece was removed, you see "Cabinet not found. It may have been moved or deleted."
Plans and roles at a glance
- A file's QR code and scanning it: every plan. Prints are not counted.
- Printing stickers and the sticker designer: Pro and higher.
- Printing a file list: Business and higher.
- In an organization the creator's plan applies; members see "Contact your organization owner to upgrade the plan." in the upgrade dialog.
- The Print hub and Manage File Types: your personal workspace, the organization's creator, and Admins.
Office layouts and locations
Office layouts are a simple drawing of your real office: rooms, cabinets, drawers and shelves. Once it is drawn, you give each file its physical place, so anyone on your team can find the paper folder from FileFlow.
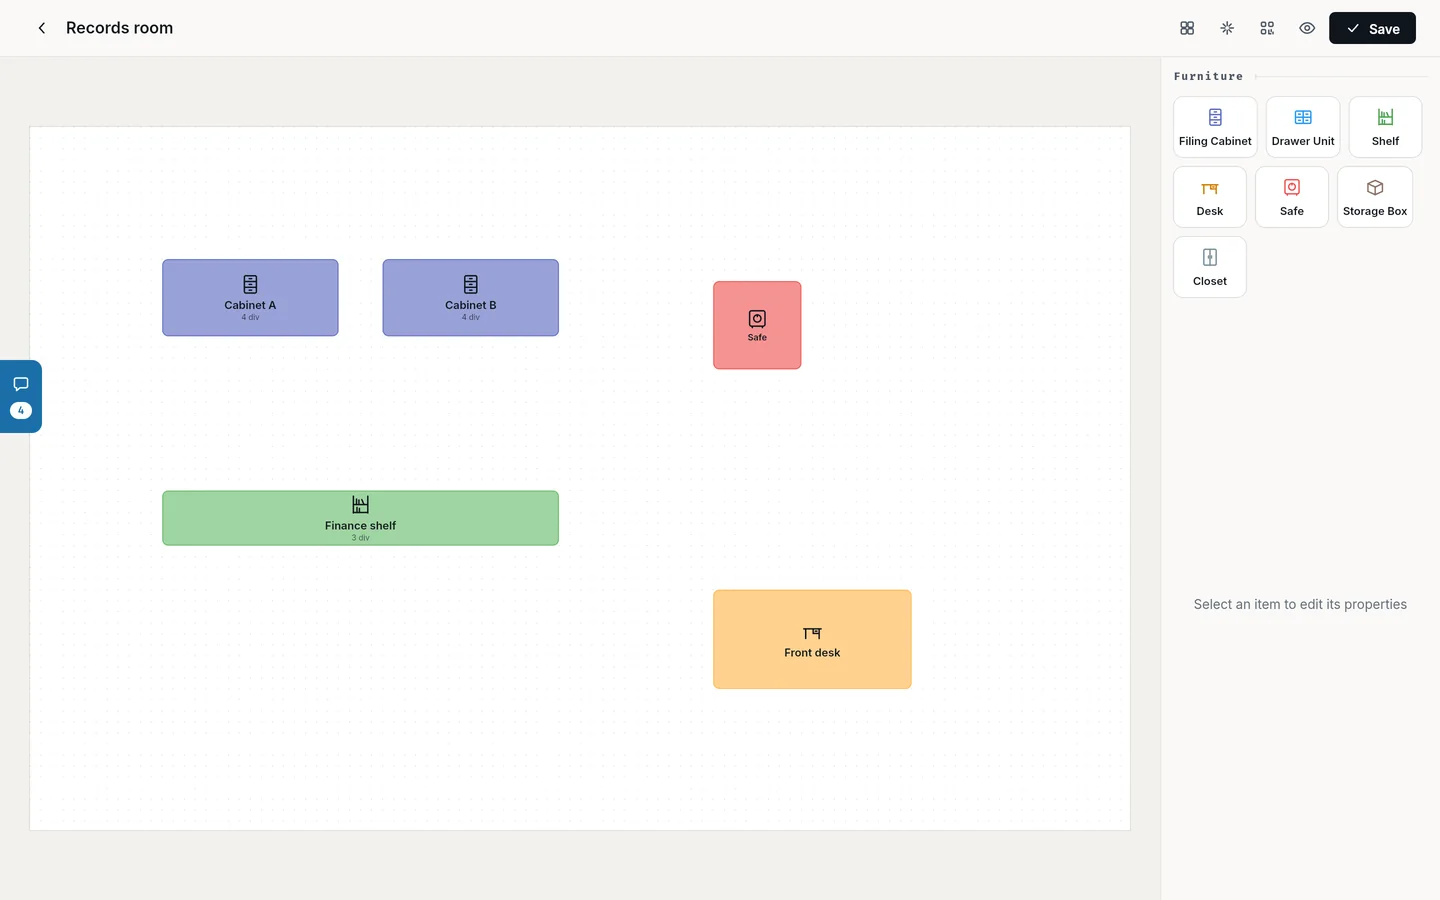
Plans and who can do what
- The Free plan does not include office layouts; trying the feature opens the upgrade dialog.
- Pro: up to 3 layouts, with the file planner.
- Business and Enterprise: unlimited layouts.
- In an organization the creator's plan applies.
Open layouts from Settings, then Office, then Office Layouts. The row is shown to every role. Creating layouts, editing them and their menus are only for your personal workspace, the organization's creator, and Admins. Editors and Viewers can open any layout to view it.
When you reach your plan's number of layouts, creating or duplicating one shows "You've reached your Office Layouts limit".
Creating a layout
- Open Office Layouts and press Create Layout. On a phone it is the floating + button at the bottom of the screen.
- Enter a Layout Name. It is required; left empty, you see "Please enter a layout name".
- Add a Floor and a Room if you want.
- Choose a Room Size: Small, Medium, Large, or Custom with your own width and height.
- Save, then open the layout to draw it.
Layouts are grouped by floor. A layout with no floor appears under General.
Drawing your office
Inside a layout, a switch moves between Edit Mode and View Mode. In Edit Mode:
- Press Add Furniture and pick a piece to drop on the drawing: Filing Cabinet, Drawer Unit, Shelf, Desk, Safe, Storage Box or Closet. On a phone this opens from the floating + button.
- Drag a piece to move it, drag its edges to resize it, and change its Rotation and color under Properties.
- Capacity is how many files the piece holds. FileFlow suggests a number; you can enter any number from 1 to 50,000.
- Subdivisions add drawers or shelves inside the piece, for example Drawer 1 or Shelf A.
- Grid Snap lines pieces up on a regular grid.
Press Save; "Layout saved" confirms it. If someone else changed the layout while you were working, you see "This layout was modified by another user." with two choices: Reload to take their changes and drop yours, or Save Anyway to replace their changes with yours.
In View Mode, pressing a piece opens the list of files inside it, with a search box.
Giving a file its physical place
Once at least one layout exists, files get a Physical Location:
- From the file's menu in the files list: Set Location.
- From the file viewer: in the side panel on a large screen, and in the bottom panel on a phone. Admins and Editors set or change the location there; Viewers only see it.
- For several files at once: select them, then choose Set Location in the action bar.
You then pick Choose Layout, Choose Furniture and Choose a Spot: a particular drawer or shelf, or Anywhere in the piece. "Location set" confirms it.
When a file has a location, the field offers Show on Layout to see the piece highlighted on the drawing, Change, and Remove Location after a confirmation. If the piece was removed from the layout, you see "Its cabinet was removed from the layout. Set a new location."
Planning files onto furniture
The planner puts your office and a queue of your files side by side, so you can drag files onto furniture quickly. It needs the Pro plan or higher. Open it from the layout's menu with Organize files, with the Plan button inside the layout, or from a project's page with Plan files to office layout, which shows only that project's files. With no layout yet you see "No office layouts yet — create one first."
- Drag a file from the queue and drop it on a piece of furniture. Every drop saves at once, with an Undo button.
- If the piece has subdivisions, FileFlow asks Where in the piece, or choose Place in body (no drawer).
- To select several files, long-press any file or use Select all visible, then Assign to….
- To remove a file's location, drag it back to the queue, or choose Unpin from its row menu.
- Narrow the queue with search and by project, type, year and sensitive files, and with All files, Unplaced or Placed.
Auto-sort. The AUTO-SORT bar places every file that has no location in one go: By project, By file type, By year, By confidentiality or By activity (hot / cold). "Plan applied" appears with the number of files placed. If every file already has a place, or there is no furniture, FileFlow tells you.
Drafts. In Saved drafts, choose Save current state to keep the current arrangement and come back to it later with Apply. Deleting a draft cannot be undone.
On a phone the office is at the top, the auto-sort bar below it, then the file queue.
Moving checklist and furniture stickers
In the layout's menu:
- Download checklist: a PDF of the files now placed on the layout, with where each one was before the last plan you applied. Print it and move the paper folders by it. If it fails, you see "Couldn't generate PDF — try again."
- Print QR stickers: a QR sticker for every piece of furniture; scanning one opens the files in it. See the chapter Printing and QR codes.
Both PDFs carry the organization's logo and color, and read right to left in Arabic.
Editing, duplicating or deleting a layout
Also in the layout's menu: Edit Layout changes the name, floor, room and size, and Duplicate makes a copy named after the layout with "(copy)". The copy counts toward your layout limit. Delete Layout asks you to confirm: "Delete this layout? File locations linked to it will be cleared." The files stay; only their physical locations are cleared.
Import, export and analytics
This chapter is about moving data into and out of FileFlow, and about reading your archive's numbers. You can build a whole structure from a CSV sheet in one go, export your structure to CSV or Excel, download a project's documents as a ZIP file, and follow your filing on the Analytics page.
Importing a CSV file
Open Settings, then Import & Export, then Import CSV. The row is shown in your personal workspace, and to an organization's creator and its Admins. It needs the Pro plan or higher; on Free the row is locked and pressing it opens the upgrade dialog.
The file must have 8 columns, and its first line must name them in this order, in lower-case English:
project_name, project_color, subject_name, sub_subject_name, second_sub_subject_name, file_type, file_code, file_detail
Rules for the file:
- Every column is required except project_color.
- file_code is the 10-digit file code in the form PP-SSBB-DDFF, for example 01-0102-0301. It sets each level's number: the Project, then the Subject and Sub-Subject, then the 2nd Sub-Subject and the File.
- project_color is a color in the form #RRGGBB, for example #4FC3F7.
- The same name must carry the same number on every row.
- Rows with the same file_code become several details of one file.
- file_type is a file type's name. If a type does not exist, FileFlow shows Missing File Types with a Create Missing Types button.
To import:
- Press Select CSV File and pick the file.
- Wait while FileFlow reads and checks it. If it finds errors, it lists them under Validation Errors with the row number and the problem; fix them and use Choose Another File. With no data rows you see "No data rows found in the CSV file."
- A summary shows how many items match, how many conflict and how many are new. An exact match (same name and same number) is reused automatically; a new item is created with the number from the file.
- Resolve the conflicts, grouped by level: Projects, Subjects, Sub-Subjects, 2nd Sub-Subjects, then Files. Or press Resolve All Automatically to take the recommended choice each time.
- Check the Preview: how much will be created, reused and skipped.
- Press Start Import.
Kinds of conflict. Name Found: the name exists with a different number. Choose Use existing (recommended), Create new with the file's number, or Skip — don't import. Number Conflict: the number is taken by another name. Choose Auto-assign next available number (recommended) or skip. Skipping any level skips everything under it.
If the import would pass your plan's limits, you see "This import exceeds your plan limits" with one line per limit: existing, new, total and the limit. Press Upgrade Plan; in an organization you see "Contact your organization owner to upgrade the plan."
The import runs in the background. An "Importing…" bar shows on every page, then "Import complete" with how much was created and reused. You can Cancel while it runs, but whatever was created before you cancelled stays, and the bar tells you how many items that was.
Export CSV
Open Settings, then Import & Export, then Export CSV. It is shown in your personal workspace, and to an organization's creator and its Admins. The file holds every project, subject, sub-subject and file with its details and file code, in the same 8 columns, so you can import it again. Documents and attachments are not included.
The file downloads as fileflow_export.csv and shows Arabic text correctly when opened in Excel. A message gives the number of rows exported, or "No data to export." if the workspace is empty, or "Export Failed" with Try Again.
Exporting a project: Excel or ZIP
On the Projects page, open a project card's menu and choose Export. It needs the Business plan or higher; on lower plans the item carries a lock mark and pressing it opens the upgrade dialog. The Export window opens with the project's name; on a phone it opens as a sheet from the bottom of the screen. Choose a Format:
- Excel Spreadsheet: the filing index as an .xlsx file. It starts with a cover page carrying the organization's name and color, the date and the number of records, then the list of files with their codes, details, types and physical locations. The sheet's headings are in English.
- ZIP Documents: every attached document, in folders that follow your filing structure down to each file's code. A multi-page document arrives as one PDF. The download size depends on how many documents there are and how large they are.
Include children exports everything inside the project. Press Export. If a ZIP export finds no documents, you see "No documents to export".
The Analytics page
On the home screen, press Analytics. The page works on every plan and in every workspace, and shows the current workspace's figures. Choose a Period: 7 days, 30 days (the default), 90 days or 12 months.
- Four cards: Documents and Files with how many were added in the period, Pages with the share of pages whose text was extracted, and Projects with the archive's size. Pressing a card opens its list, except Pages.
- Filing activity: a chart of what was added by day, week or month.
- Needs attention: overdue reminders, reminders due within 7 days, pages whose text could not be read (pressing it opens the retry sheet for people who can edit), pages kept without text at the monthly limit, pages waiting for text recognition, and files with no documents. When there is nothing, you see "Nothing needs attention".
- Open reminders, each with its due date or the date it became overdue.
- Where documents are filed, by project, and File types.
- Team Activity: each member's documents and files and when they were last active. In an organization only its creator and Admins see it.
- Your plan: storage, files and OCR pages used against the limit, with Open billing. Only the plan's owner sees it: in your personal workspace, and the organization's creator.
The figures leave out the Trash and anything hidden from you. A member who is not the organization's creator sees the note "Figures count only what you can open in this organization." If the page cannot load, you see "Failed to load analytics".
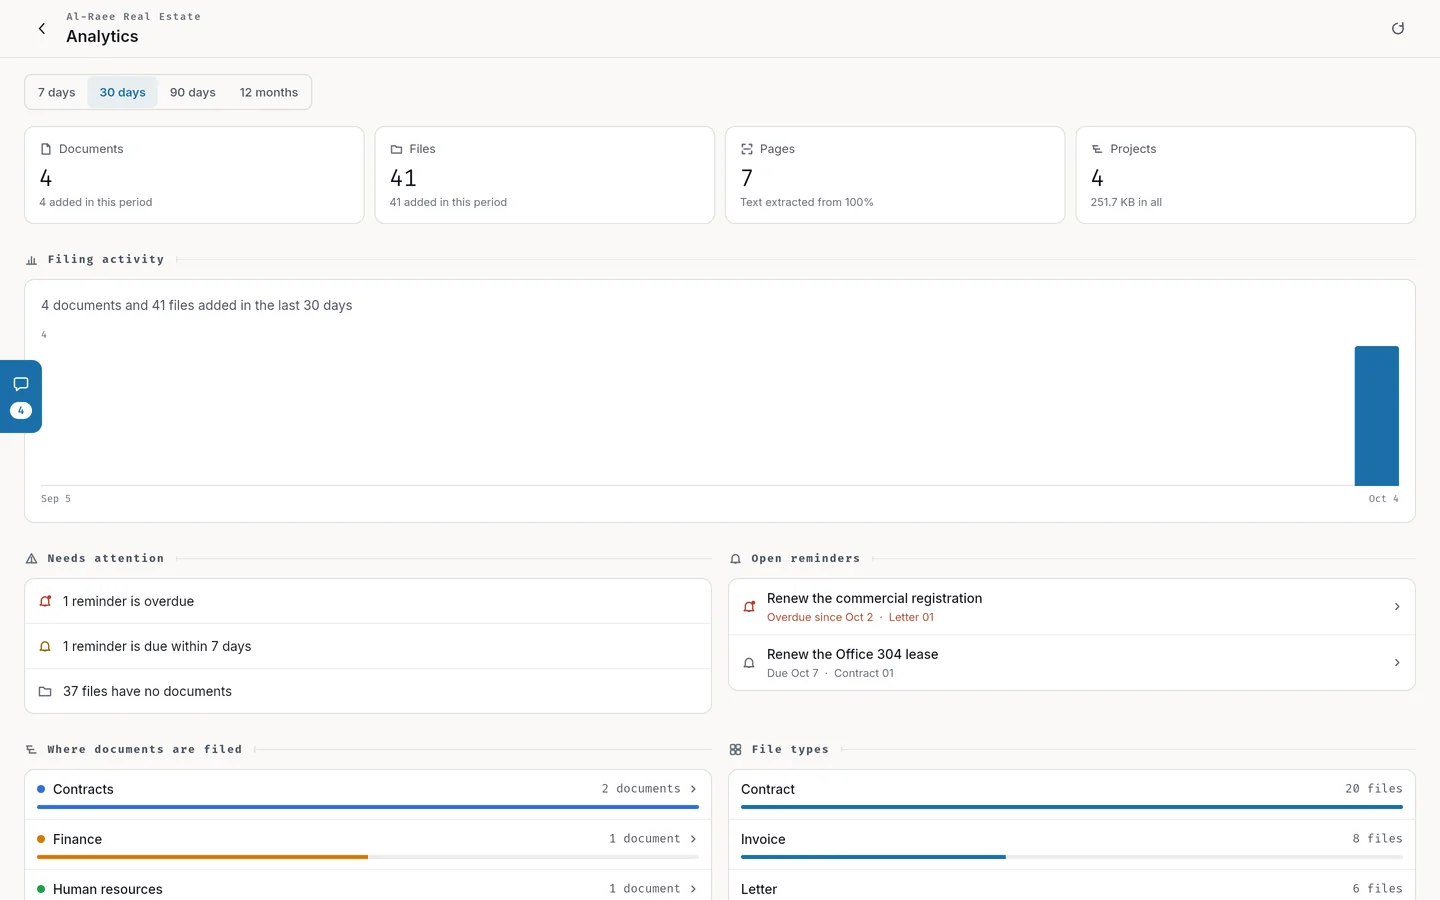
Plans and billing
Your plan sets how much you can keep in FileFlow and which features you have. This chapter covers the plans and their limits, how to subscribe and pay, how to change or cancel your plan, and what happens when a payment fails.
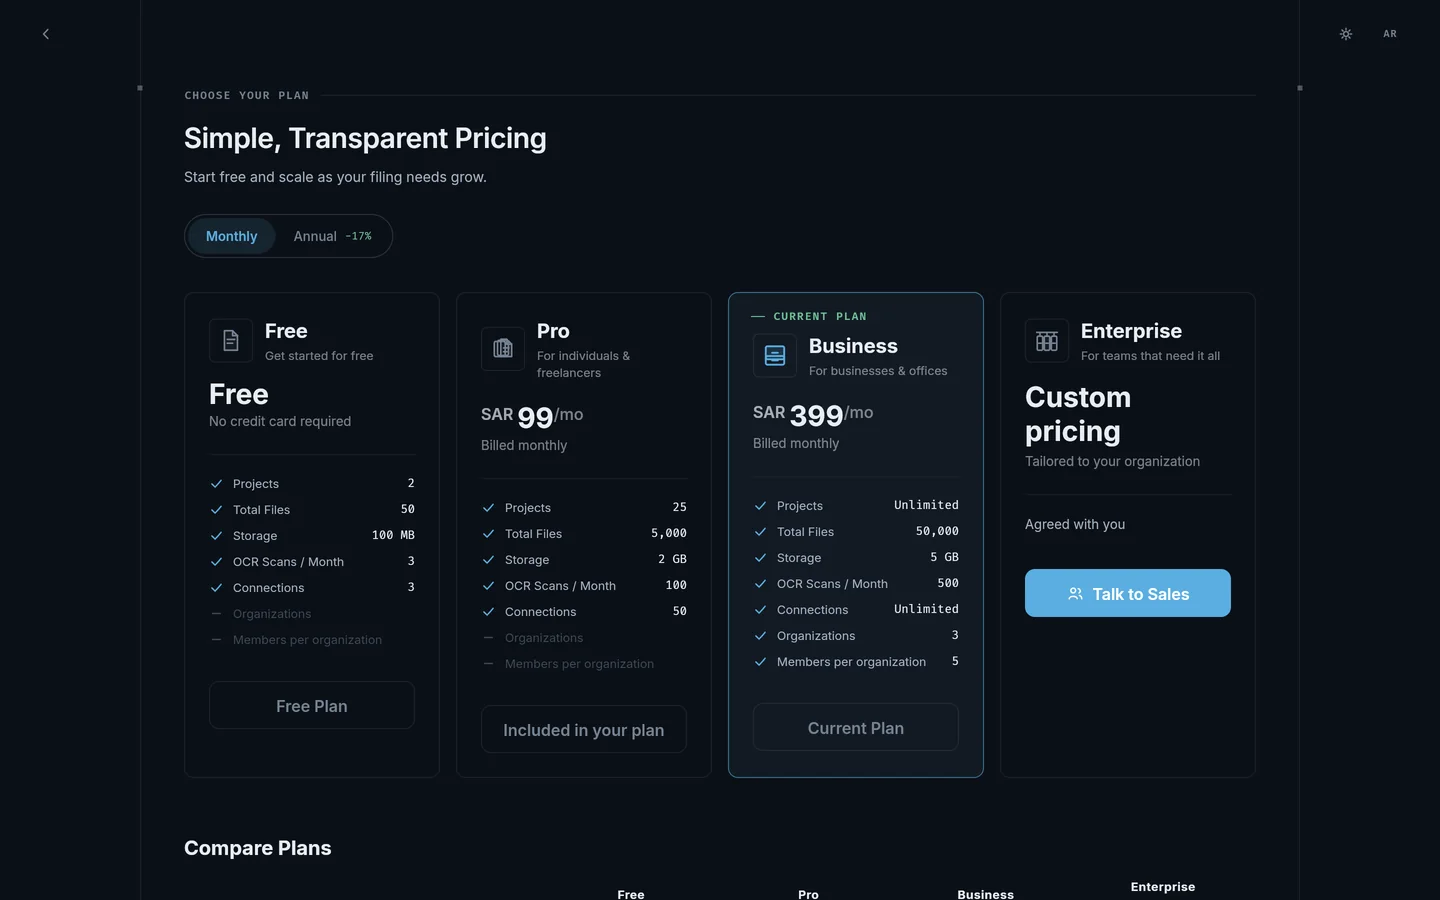
Plans, prices and limits
FileFlow has four plans: Free, Pro, Business and Enterprise. Prices are in Saudi riyals:
- Free: no charge, and no card needed.
- Pro: SAR 99 a month, or SAR 990 a year.
- Business: SAR 399 a month, or SAR 3,990 a year.
- Enterprise: custom pricing, agreed with you through Talk to Sales.
A year costs the same as 10 months, about 17% less than paying monthly.
The limits below are for Free, Pro and Business, in that order. Enterprise limits are agreed with you.
- Projects: 2, 25, unlimited.
- Subjects per project: 5, 25, unlimited. Sub-subjects per subject, and 2nd sub-subjects per sub-subject: 5, 20, unlimited.
- Files per category: 5, 50, unlimited.
- Total files: 50, 5,000, 50,000.
- Documents per file: 1, 25, unlimited. Categories per file: 1, 10, unlimited. File details per file: 1, unlimited, unlimited.
- Storage: 100 MB, 2 GB, 5 GB.
- Largest single upload: 2 MB, 20 MB, 50 MB.
- OCR pages a month: 3, 100, 500.
- Tags: 3, 50, unlimited.
- Connections: 3, 50, unlimited. Shares a month: 3, 100, unlimited.
- Organizations: none, none, 3. Members per organization: 5 on Business, counting the creator.
- Custom file types: none, 1, 3.
- AES-256 encryption, batch document scan, CSV import, the sticker designer, sticker printing and office layouts: Pro and up. Office layouts: 3 on Pro, unlimited on Business.
- Export to spreadsheet and printing the full file list: Business and up.
- QR label prints: unlimited on every plan.
In an organization, the creator's plan limits apply to every member, and the organization's storage and usage count against the creator.
Reaching a limit, and add-ons
When you reach a limit or try a feature your plan does not include, an upgrade dialog appears, for example "You've reached your Projects limit" with your usage and the limit, or "Sticker Designer is a Pro Feature". If you upload a file larger than your plan allows, you see "File Too Large". The dialog shows the right upgrade button and Maybe Later. In an organization you did not create, there are no upgrade buttons; instead you see "Contact your organization owner to upgrade the plan." On the highest plan you see "You're on the highest plan. Contact support if you need higher limits."
Add-ons. An add-on raises one limit without changing your plan. They are available on Pro and Business:
- Extra Storage: 1 GB for SAR 9 a month, up to 50 units on Pro and 150 on Business.
- OCR Pages: 50 pages a month for SAR 12 a month, up to 10 units on Pro and 20 on Business.
To buy one, open Billing, then Browse Add-ons. You pay a prorated amount today up to the end of the current month, then the full amount monthly, even if your plan is annual. To cancel an add-on, press Cancel add-on and choose how many units to cancel. It stays on until the end of the billing period, and you can Reactivate it before then. Cancelling your plan cancels every add-on with it.
Subscribing and paying
- Open Choose Your Plan from Billing with Upgrade Plan or Change Plan, or from the upgrade button in a limit dialog.
- Choose Monthly or Annual, then press the plan's button.
- On Checkout, check the Order Summary, enter your card details and press Pay with the amount.
Billing follows the calendar: a monthly period ends on the last day of the month and an annual one on 31 December. So a new subscriber pays only for the days left, shown as Prorated until the period's end date, and the full price starts next month or on 1 January. The smallest card charge is SAR 1.
Accepted cards are Visa, Mastercard and mada, with your bank's extra check when it asks for one. Payments are processed by Moyasar; your card details are never stored on FileFlow's servers, and the card is saved with Moyasar for automatic renewals. FileFlow checks every payment before switching anything on. You may see:
- "Payment Successful!": your plan is active.
- "Confirming your payment": your bank has not confirmed the payment yet. If it goes through, your plan switches on by itself and we email your receipt, so do not pay again.
- "Payment Cancelled": nothing was charged.
- "Payment Failed": try again or use a different card.
- "Payment received, not applied": the payment did not match the order, so nothing changed; our team will sort it out or refund you.
Promo codes. On Choose Your Plan, press Have a promo code?, enter it and press Apply, or enter it in the Promo code field at checkout. Codes work for new subscriptions only and are not offered when you upgrade. Each person can use a code once, and it counts only once the payment succeeds. A wrong or expired code shows "Invalid or expired promo code."
All payments are final and non-refundable, except the card check and a payment that was received but not applied.
Changing or cancelling your plan
- Upgrading to a higher plan is immediate. The unused days of your current plan and your account credit come off the price. If the credit covers it, you see Upgrade with Credit; anything left over shows on Billing as Account Credit and is applied on your next upgrade. Upgrading cancels any scheduled change.
- Moving to a lower plan happens at the end of the current period. The Downgrade Plan dialog warns you about anything over the new plan's limits. Items over a count limit become read-only and are not deleted, and add-ons the new plan does not allow are cancelled.
- Switching between monthly and annual on the same plan happens at the end of the current period.
A scheduled change shows at the top of Billing as Switching to the plan on a date. You can undo it with Cancel Scheduled Change.
Cancelling. On Billing, under Manage Plan, press Cancel Subscription. Your plan stays active until the end of the billing period, then you move to Free, and every add-on is cancelled. Press Cancel to confirm or Keep Plan to back out. Afterwards the page shows Cancels on a date, and you can press Undo Cancellation until that day.
If your storage is over the new limit after a downgrade or the end of your plan, the extra files are locked and a 30-day grace period starts. You get reminder emails during it, and a "Files locked" bar appears. Delete files, buy extra storage or upgrade to lift the lock. If the period ends with storage still over the limit, FileFlow permanently deletes only as much as it takes to get back under the limit, starting with the Trash.
Your card, renewals and failed payments
Billing has a Payment Method card. Press Update to change your card, Add Card if there is none, or Re-verify if asked. Saving a card charges SAR 1 to check it, and the SAR 1 is returned; you see "Card updated. The SAR 1 check is returned to you." If the card cannot be saved, you see "Your card couldn't be saved. No charge was kept. Try again."
Your plan renews automatically from the saved card. If a renewal fails, your status becomes Past Due, and every page shows "Your last payment didn't go through. Update your card to keep your plan." with Update Card. FileFlow retries at most every 3 days, and within a day once you add a new card. After 14 days past due, the plan is cancelled, you move to Free and add-ons are cancelled. You then see "Your subscription has ended. You're on the Free plan — some features are limited." with Resubscribe.
The Billing page and invoices
Open Settings, then Billing & Subscription, then Manage Subscription, or press the plan badge on your profile card. The page is available in your personal workspace and to an organization's creator, because it is your own plan. If you are a member of someone else's organization, switch to your personal workspace to see your plan.
From the top, it shows your plan, its cycle, renewal date and status; then the next billing date, account credit, payment method, add-ons, storage, and Monthly Usage for OCR pages and shares; then Manage Plan and Invoice History.
Invoice History shows your last 5 invoices, with the rest under View all invoices. Press Download invoice for a PDF invoice in Arabic and English. A payment may carry the status Refunded, Not charged or Received — under review; the last means our team will apply it or refund it, so you do not need to pay again.
Enterprise
Enterprise is for teams with larger needs and is not bought from the page. Press Talk to Sales and fill in the form: your name, work email, company, team size, phone and what you need, then Send inquiry. We reply within 1 business day.
Once it is set up, the FileFlow team manages your account: billing, add-ons and limits, with no card needed. Billing shows a Managed Enterprise account card and Contact account manager. If we send you an invoice with a payment link, it shows Pay now and the date the link is valid until. If the link will not open, write to support@kern.sa for a new one.
Security and your account
The Security group in Settings is where you protect your account: change your email or password, turn on two-factor authentication, save a recovery key, and manage trusted devices and connected apps. This chapter also covers the one-session and one-tab rules, signing out, and deleting your account. Security shows for everyone, in every workspace.
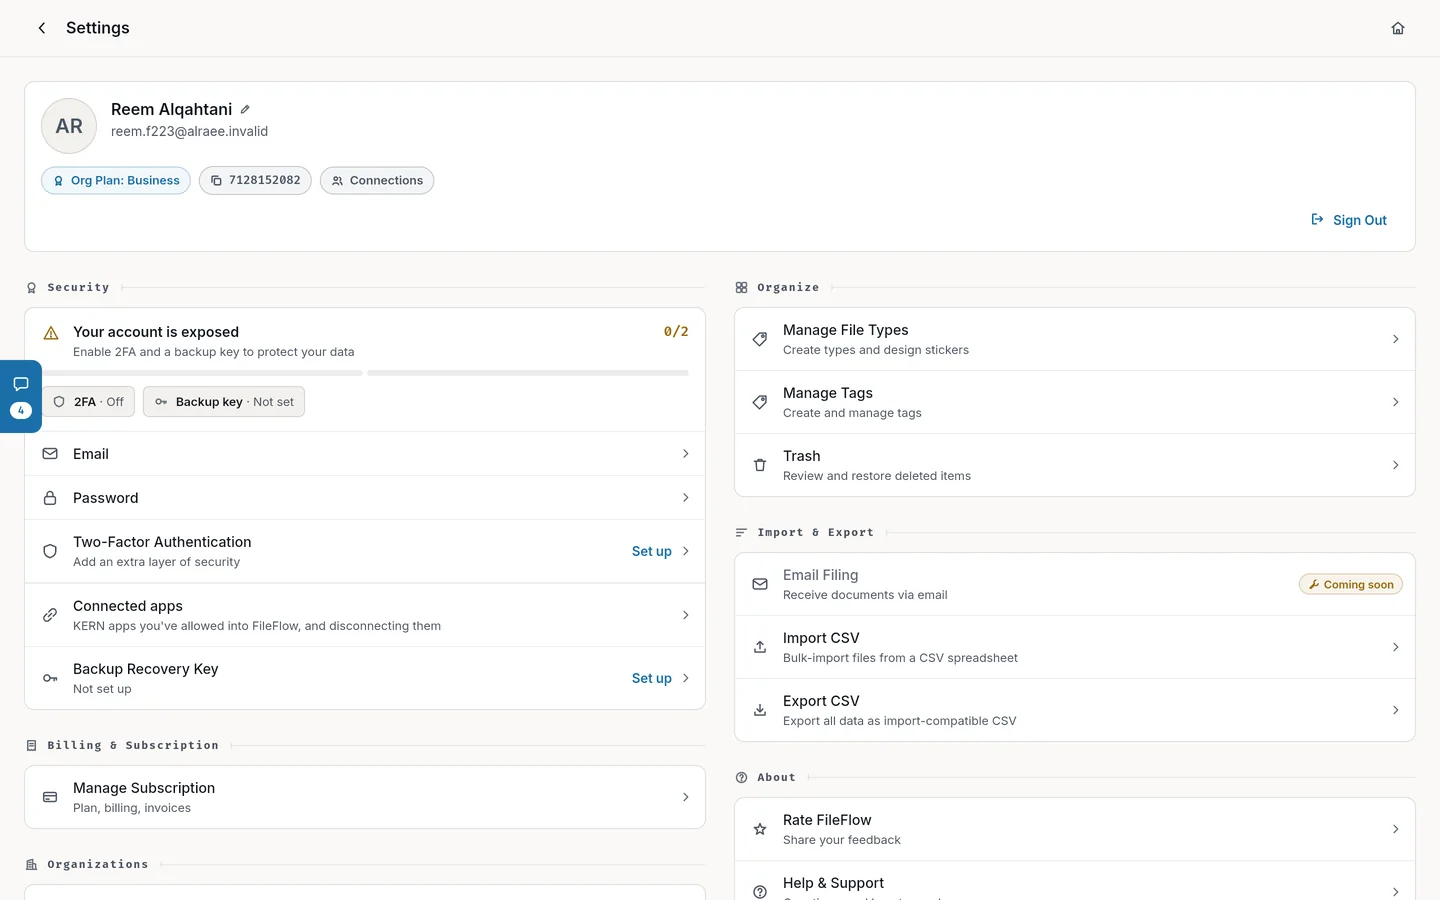
Security score
At the top of the group is a two-step meter: two-factor authentication (any method) and a saved backup key. With neither, you see "Your account is exposed"; with one, "Almost there — one more layer to go"; with both, "Fully secured". Two chips below it show your verification method and the key's status.
Email and password
Changing your email. Press Email, enter the New email twice, then your Current Password. If you use an authenticator app, it asks for its code first. A 6-digit code goes to the new address; enter it. You can resend it after 60 seconds. "Email changed successfully" confirms it. Possible errors: the emails do not match, it is the same as your current one, another account uses it, or "Incorrect password".
Changing your password. Press Password, enter your Current Password, then the New Password twice. It must be at least 8 characters. If you use an authenticator app, it asks for its code. "Password updated" confirms it; every trusted device loses its trust, and your other sessions end.
If you sign in with Google, you do not see the email and password rows; you see Signed in with Google instead.
Two-factor authentication
Two-Factor Authentication asks for an extra code after your password when you sign in. Press the row to choose a method:
- Email Code: a code is emailed to you at each sign-in. Not available for Google accounts.
- Authenticator App: a code from an app such as Google Authenticator or Authy. It is stronger than email.
You can turn on both, and choose one at each sign-in.
To set up the email code, enter your password; a 6-digit code is emailed, and the method turns on once you enter it. To set up an authenticator app:
- Enter your password (Google accounts are not asked).
- In Set Up Authenticator App, scan the QR code with the app, or press Can't scan? Enter manually and copy the key.
- Enter the 6-digit code from the app and press Verify & Enable.
The same dialog adds or removes the other method, for example Add Authenticator App, Remove Authenticator App or Disable Email 2FA, and asks for your password to confirm. Any change to your methods removes trust from every trusted device, including this browser.
Trusted devices. The code screen at sign-in has a Trust this device for 30 days box. If you tick it, this browser is not asked for a code for 30 days. Trust belongs to the browser, is lost if you clear the site's data, and does not replace the code for sensitive actions such as deleting an account protected by an authenticator. The Trusted Devices row appears under Security while two-factor authentication is on. It lists This device and Other devices, with when each was last used and when its trust expires. Each device's menu has Rename and Revoke; Revoke all removes trust from every other device and keeps this browser.
Backup recovery key
The Backup Recovery Key lets you into your account if you lose your password or your authenticator (see the chapter Getting started). To create it, press the row and enter your password (Google accounts are not asked). The Backup Recovery Key dialog opens:
- Press Reveal to see the key, or Copy to copy it.
- Keep it in a password manager or write it down. It will not be shown again.
- Tick I have saved my backup recovery key; the close button then becomes active.
FileFlow does not store the key itself. If you lose it, make a new one with Regenerate Recovery Key: the old key stops working at once, and this cannot be undone.
One session, one tab, and signing out
One session per account. Each new sign-in ends the previous session on any other device. The new device shows "Previous session on another device has been signed out."; the old one shows Session Ended within seconds or when you return to it. If it was not you, change your password and turn on two-factor authentication straight away. Press It was me, continue to go to the sign-in page. Reloading the page does not end your session.
One tab at a time. If you open FileFlow in another tab, the new tab becomes the active one and the old tab is covered by an Already open page. Press Use here instead to take it back, or close it and carry on in the other. This prevents conflicting changes.
Signing out. Press Sign Out on your profile card at the top of Settings. It happens at once, without a confirmation, and "Signed out successfully" appears. This browser keeps its trust if it was trusted.
Connected apps
Other KERN apps, such as Aqarly, can file documents into FileFlow once you approve them. When you connect from Aqarly, FileFlow opens Connect an application, asking "Allow Aqarly to use FileFlow?". If you are signed out, it asks you to sign in and brings you back to the request.
- Choose the workspace the app will work in: Personal archive or one of your organizations, with your role shown under each.
- Check What it is asking for: see the workspace name and how much storage is left, see your filing tree to choose where things go, open only the documents this app added, and create folders and add documents.
- Press Approve and connect, or Cancel to go back without sharing anything.
If you are a Viewer in the chosen organization, the app can read but not add or change anything. The app never sees your password, cannot work outside the workspace you chose, and what it uploads counts toward that workspace's storage.
Files and folders Aqarly uses carry a Used by Aqarly badge. When you trash, permanently delete or move a linked item, a dialog shows What's linked, What happens and Can this be undone?: restoring from the Trash brings the links back as they were, and a move breaks nothing, but deleting permanently removes the links, and each Aqarly record then has to be pointed somewhere new by hand. Choose Leave it alone if you change your mind. If the link check fails, you see "The link check did not answer" with Try the check again or Continue without the check.
Disconnecting. Under Security, press Connected apps. You see every app you connected and, if you are an Admin in an organization, that organization's apps, with where each one files, who connected it, when it was last used and what it can do. Press Disconnect and confirm. The app loses access at once; the files and documents it filed stay in FileFlow, and their badge changes to Aqarly · not connected. To use it again, connect it again from Aqarly; it finds its earlier links.
Deleting your account
In Settings, under Danger Zone, press Delete Account. The first window lists what will be deleted for good: your projects, subjects and files, documents and stickers, connections, items shared with you or by you, saved cards, the workspaces you own, and your account. If you created an organization that has other members, it is deleted for them too and each member is told; you do not need to delete the organization first. What stays: your payment records and issued invoices, no longer linked to you, because the law requires us to keep them, and work you added to other people's organizations, which stays there.
Press Continue, then prove it is you: enter your password and press Delete My Account, or, if you sign in with Google, type your email exactly. With two-factor authentication on, you may be asked to sign in again with your code before deleting; a trusted device is not enough here.
Deletion is permanent and cannot be undone. Afterwards this device is signed out. If deletion fails, a message confirms that nothing was deleted; try again, or write to support@kern.sa.
Settings and help
The Settings page brings together your profile, display preferences, workspace tools and help. This chapter walks through the page, points you to the chapters that cover each tool in detail, and shows how to reach support.
Opening Settings and what is in it
On a large screen, press Settings in the bar at the top of the home screen. On a phone, open the three-dot menu at the top of the home screen, then Settings. On a large screen the groups sit in two columns.
The groups, in order, and who sees each:
- Security: everyone. See the chapter Security and your account.
- Billing & Subscription: your personal workspace, and an organization's creator. See the chapter Plans and billing.
- Organizations: everyone. In your personal workspace it holds Manage Organizations; if your plan does not include organizations, the row shows as locked with a Business badge. Inside an organization it shows the organization's name: the creator and Admins open its settings, and others see their role. See the chapter Organizations, members and roles.
- Office: Office Layouts for everyone, and Print for your personal workspace, an organization's creator and Admins. See the chapters Office layouts and locations and Printing and QR codes.
- Appearance: everyone.
- Organize: everyone, with rows that depend on your role.
- Import & Export: the import and export tools, for your personal workspace, an organization's creator and Admins.
- About: everyone.
- Danger Zone: everyone, with Delete Account, and Delete Organization for an organization's creator while inside it.
A row locked by your plan carries a lock mark, and pressing it opens the upgrade dialog.
Your profile card
At the top of the page, a card shows:
- Your name: press it to change it in Edit Display Name. It accepts Arabic or English letters and spaces only, from 2 to 50 characters. "Display name updated" confirms it. With no name you see Set name.
- Your email.
- Your plan badge, such as Pro Plan, or Org Plan inside an organization. If you manage the plan, pressing it opens Billing.
- Your 10-digit user ID with a copy button; "UID copied" confirms it. Others use it to add you; see the chapter Connections and sharing.
- Connections, to open your connections page.
- Sign Out.
Appearance and language
- Dark Mode: a switch between the dark and light themes.
- Language: choose EN for English or AR for Arabic. The app changes at once, including its direction. The sign-in pages have their own language and theme switches.
- Home layout: choose Standard or Focus. See the chapter Home and finding your way.
- Text Size: from 80% to 140% in steps of 10, with a live preview.
Organize, Import & Export
The Organize group:
- Manage File Types: your personal workspace, an organization's creator and Admins. See the chapter Printing and QR codes.
- Manage Tags: create and manage tags. See the chapter Files.
- Trash: your personal workspace, an organization's creator and Admins. See the chapter Trash.
The Import & Export group: Import CSV and Export CSV for your personal workspace, an organization's creator and Admins. See the chapter Import, export and analytics.
About
- Rate FileFlow: pick a rating from five levels, add a review if you like, then Submit. You can update your rating later.
- Help & Support: the FAQ and ways to reach us.
- FAQ.
- Replay Welcome Tour: plays the intro slides again. See the chapter Getting started.
- FileFlow's version and Latest update. Press it to see What's New. A New badge shows when there are release notes you have not read.
Help and support
Open Settings, then About, then Help & Support. The page has two tabs:
- FAQ: search in the Search questions... box, or browse the categories: Getting Started; File System & Codes; Account & Security; Sharing & Collaboration; Import, Export & Documents; Tags, Search & Organization; and Technical & Troubleshooting. With no match you see "No matching questions".
- Contact: press Email Support to open your email app addressed to support@kern.sa. We usually reply within 24 hours on business days.
This guide
The first row of the FAQ tab is User guide, which opens this guide inside the app: pick a chapter from the contents, or search for a word in Search the guide.... The guide is also open to everyone at fileflow.sa/en/guide, and Download the guide (PDF) saves it as a PDF to print or read offline, in Arabic or English to match the app's language.
Help & Support needs you to be signed in. The FAQ is also open to everyone at fileflow.sa/faq.
When you write to support, email support@kern.sa from any address and include the email you sign in to FileFlow with, what you were doing when the problem happened, and the text of any message you saw. A screenshot helps a lot.